Table of contents
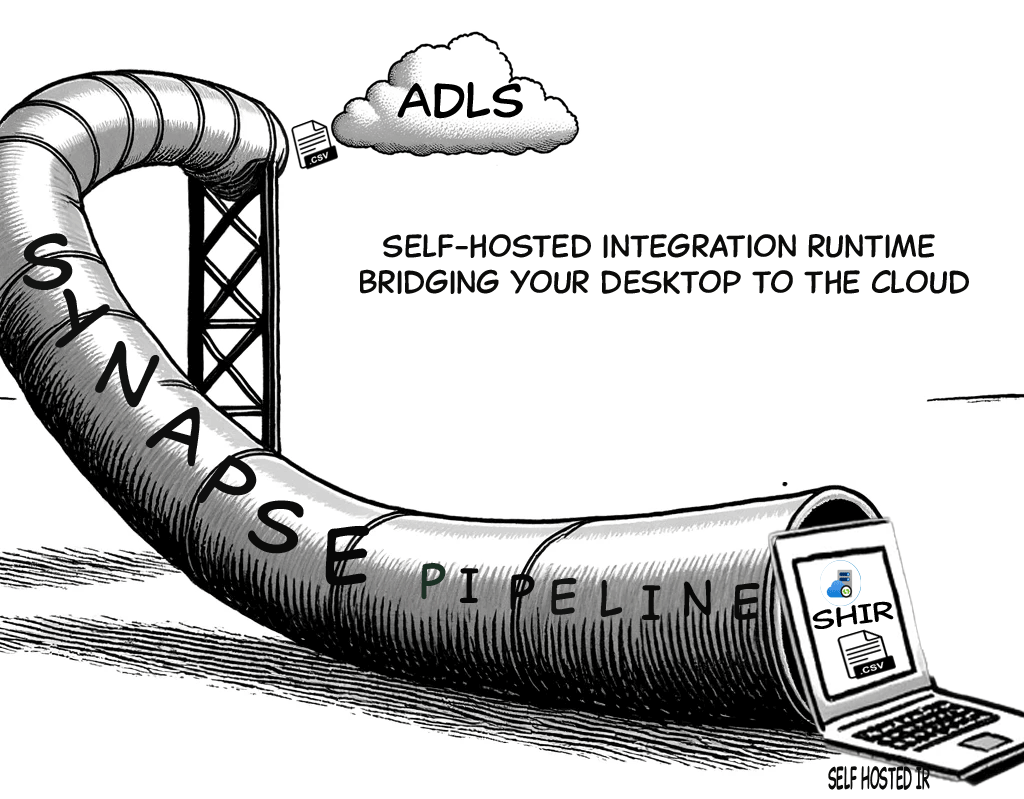
A Simple Synapse Pipeline. Copy files from Laptop To ADLS
We have a Synapse workspace and some CSV files on our laptop that we want to upload to ADLS. Here is the Microsoft recommended way to do it:
- Install SHIR on the laptop.
- Create a pipeline with a copy data activity.
-
Run the pipeline.
In Power Platform, the SHIR is replaced by the on-premise gateway. Both are software installed on your local machine, but one is for Synapse and the other is for Power Platform, Fabric, etc.
Let’s get our hands dirty and see how to do it.
For the busy people
An outline of all the activities typically involved in this process is provided in the table below. For more details, please continue reading the following sections.
| Step | Action | Definition |
|---|---|---|
| 1: Open Synapse Workspace | Synapse Workspace | Every synapse instance has a workspace. This is the central place for all synapse activities. |
| 2: Install SHIR on Laptop | Self-hosted Integration Runtime (SHIR) | A software installed on your laptop to enable data movement from on-premises to the cloud. More details on Integration Pipelines |
| 3: Create Linked Services | Linked Services | These are connection strings to your data sources (local file system) and destinations (ADLS). |
| 4: Define Datasets | Datasets | These are like file type. In this case the source and destination datasets are .csvs |
| 5: Build the Pipeline | Pipeline | A pipline is a workflow, it contains many tasks like Copy data etc. |
| 6: Add a Copy Data Activity | Copy Data Activity | This is a very important activity that takes care of the entire data copying. |
| 7: Set Up Triggers | Triggers | This will tell what will trigger the pipeline |
Create and Configure an Integration Runtime
The very first step is to install the integration runtime on the local machine. The IR is the backbone of the connection between the local folder and Synapse.
- In your synapse workspace go to Manage -> Integration -> Integration runtime.
-
Click on New, then in the settings, you will have two install options. Choose an express setup.
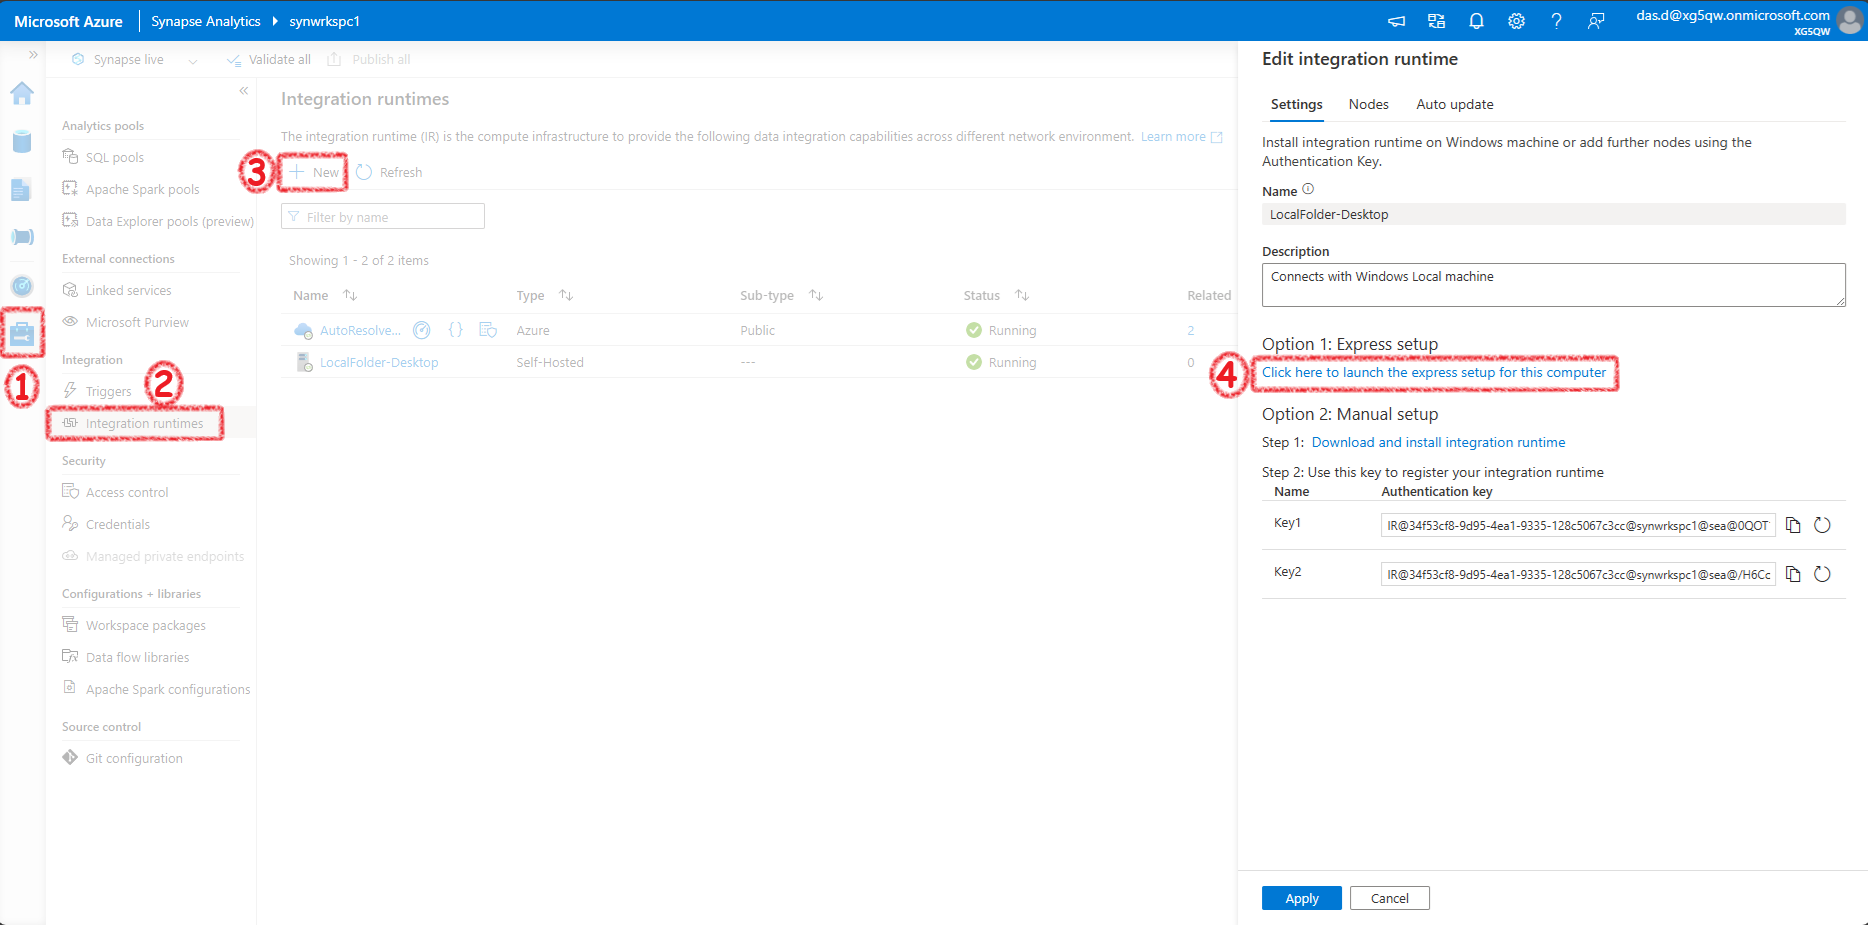
Express setup is a quicker option as it both installs and links the local IR environment with the synapse setup. If you prefer to do a manual setup, refer to to appenxis.
Create Two Linked Services (Connection Strings)
Next, we need to create two connection strings (also known as Linked Services): one to the local laptop’s folder (source) and another to the ADLS (destination).
Linked Service to Laptop’s Folder
- In Synapse workspace, go to Manage -> Linked Services -> New.
- Select File System and provide a name for the linked service.
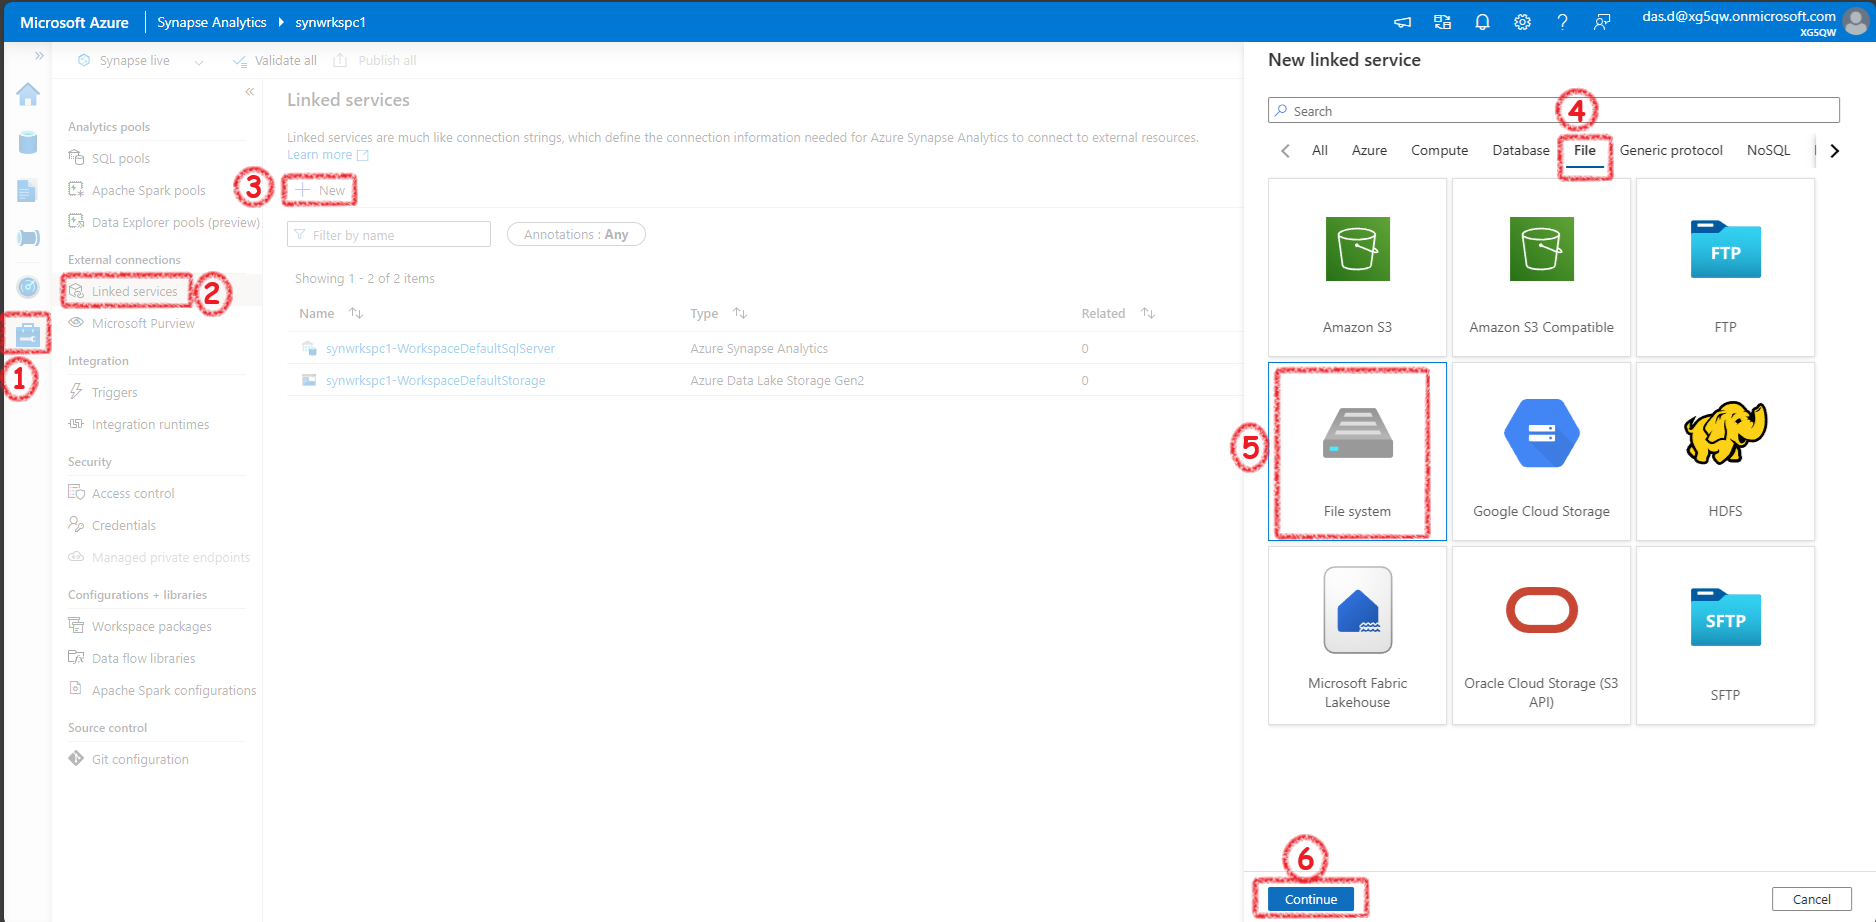
- Select the Integration Runtime we created earlier.
-
Specify the path to the CSV files on your laptop and provide a user name and password which has read/write access to the folder.
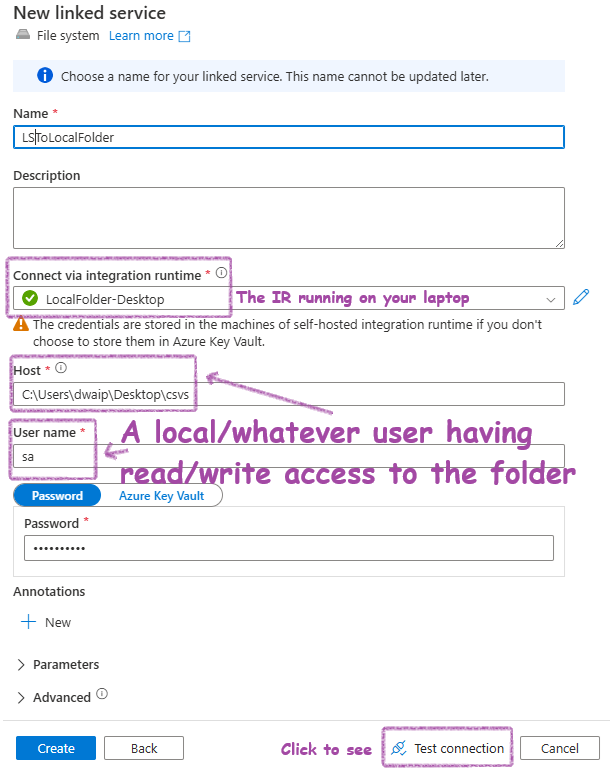
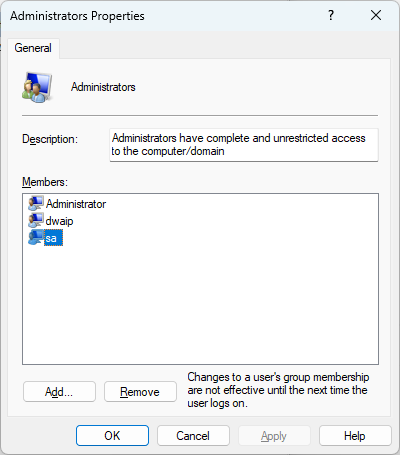
Here, sa is a local user which has read/write access to the folder.
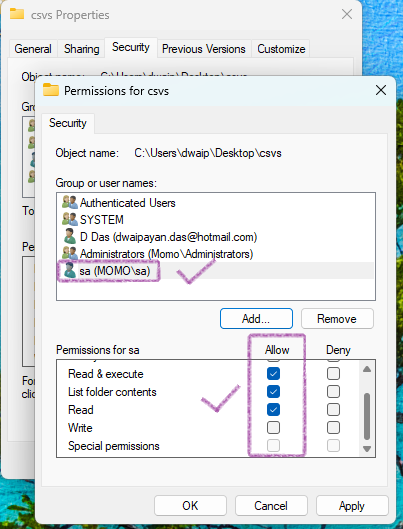
Go to the properties of the source folder and navigate to the security tab to check if the user has the appropriate permissions for the folder.
A Common Error
After setting up the linked service when you Test connection it may fail. 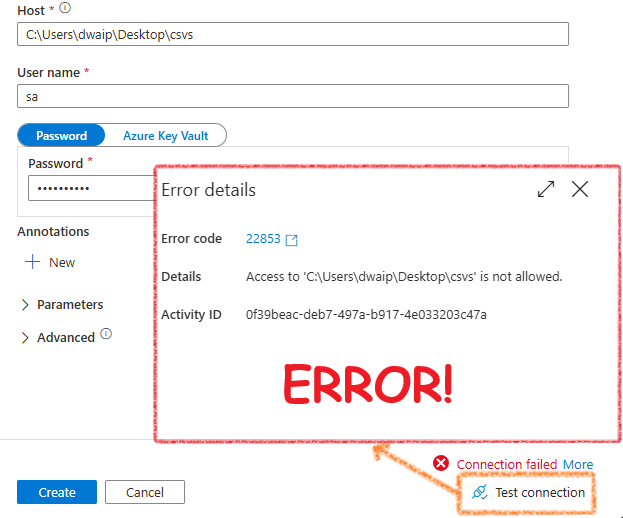
This has nothing to do with the setup but a windows security feature which causes the issue. To resolve this, open Command Prompt as Administrator and run the following commands:
   cd C:\Program Files\Microsoft Integration Runtime\5.0\Shared
   .\dmgcmd.exe -DisableLocalFolderPathValidation
This will disable local folder path validation, and Test connection will pass this time. 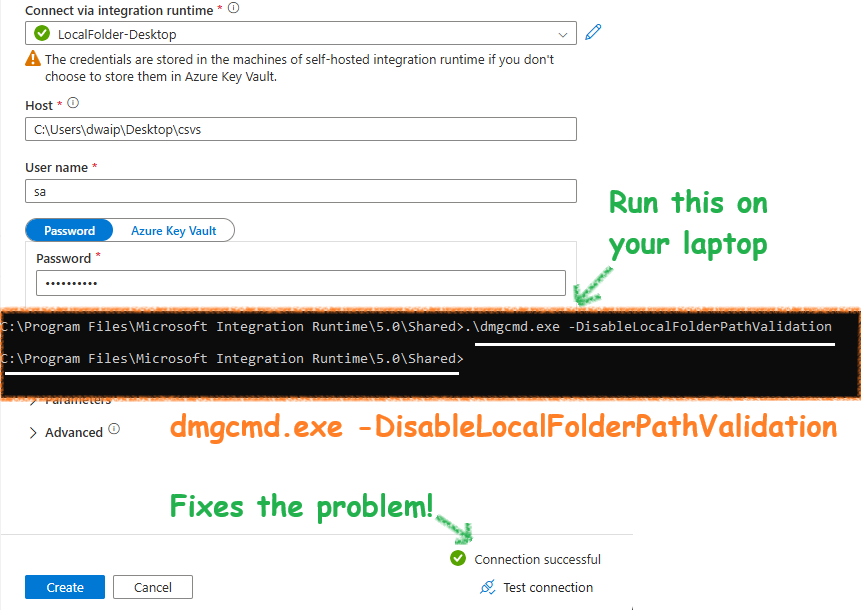
Linked Service to ADLS
- Navigate to Manage -> Linked Services -> New.
-
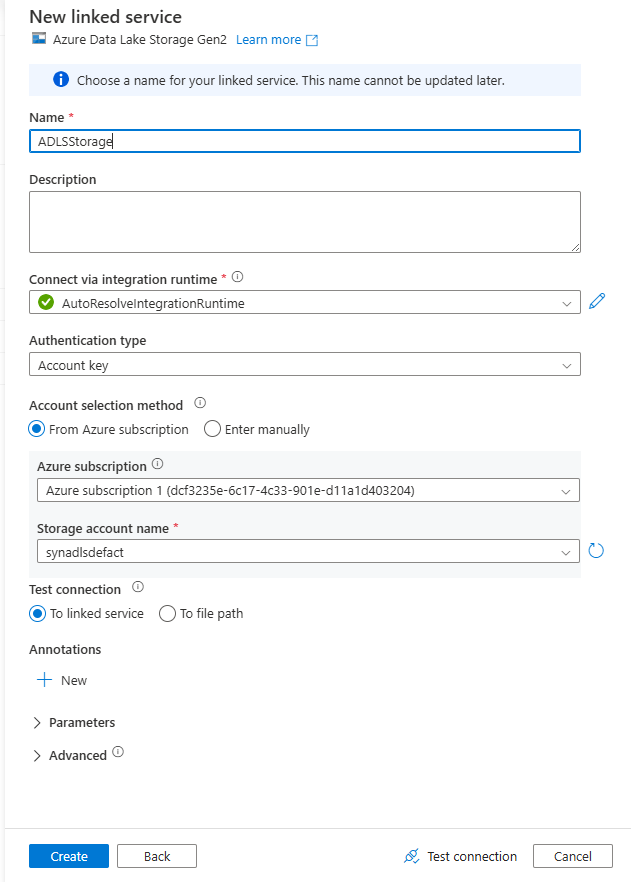
Select Azure Data Lake Storage Gen2.
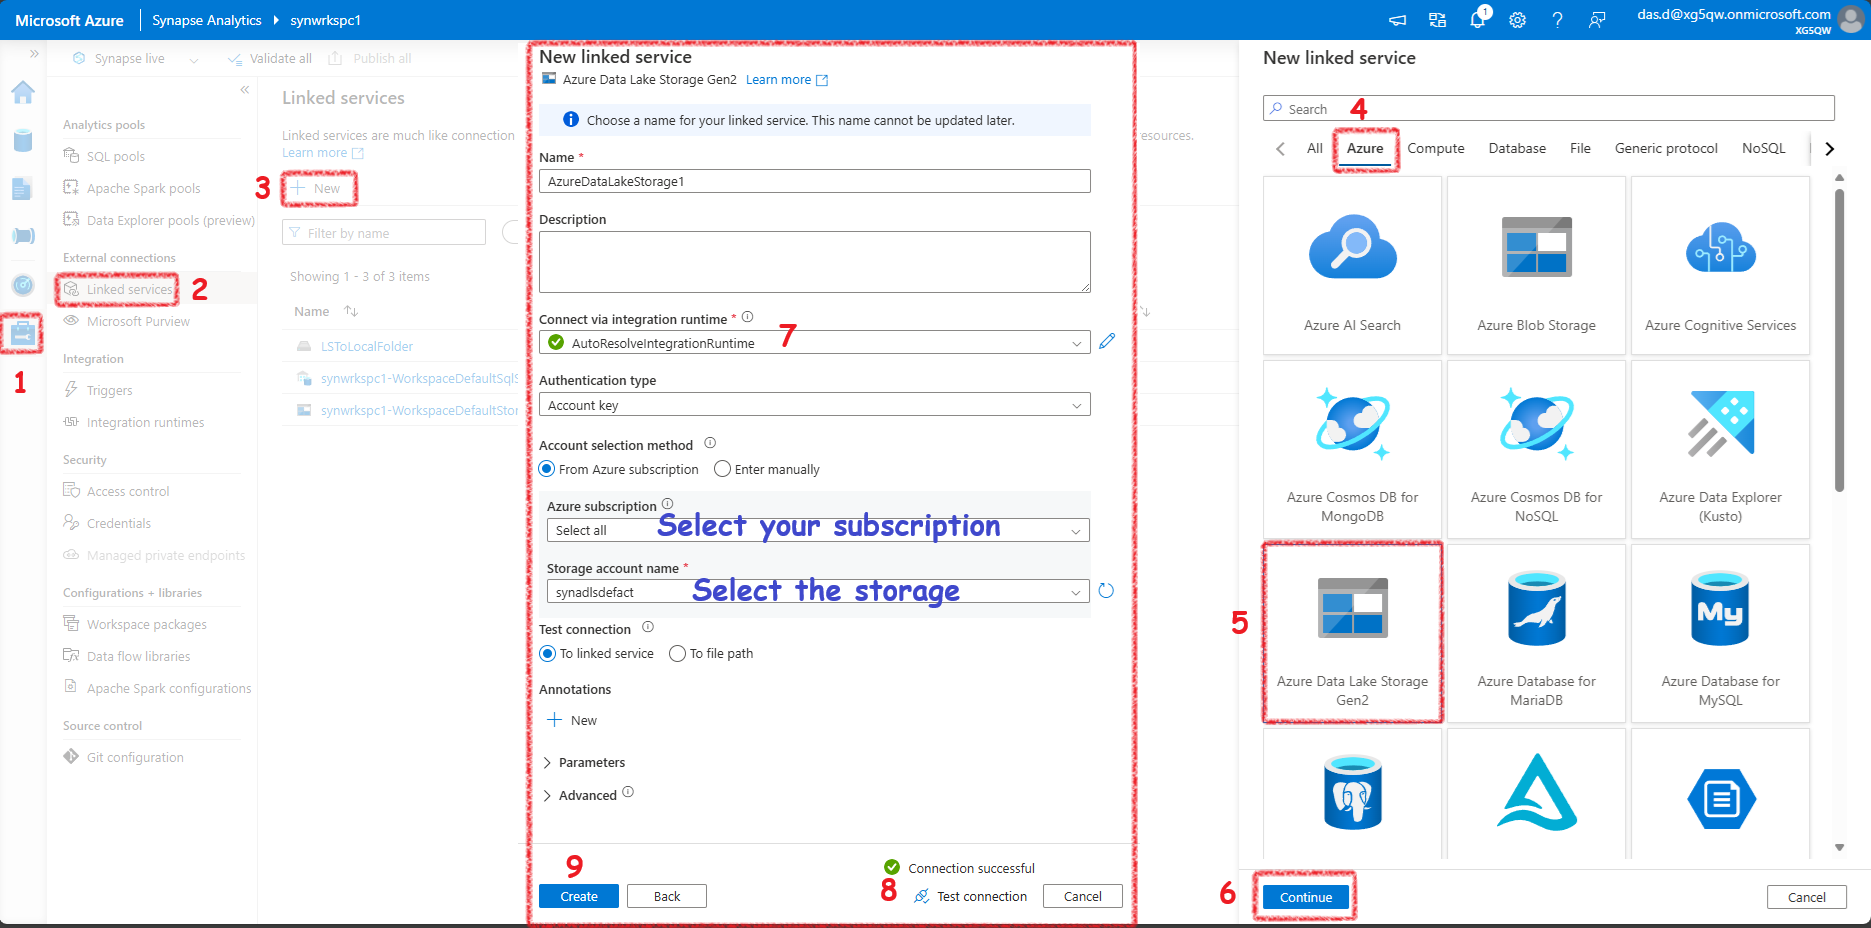
- In Our case we will use AutoResolveIntegrationRuntime. Sometimes its a good choice.
Create a Pipeline with Copy Data Activity
Now that the linked services are configured, create a pipeline to copy data:
Crate a New Pipeline in Syanpse Workspace
In Synapse workspace, go to Integrate -> Pipelines -> New Pipeline. 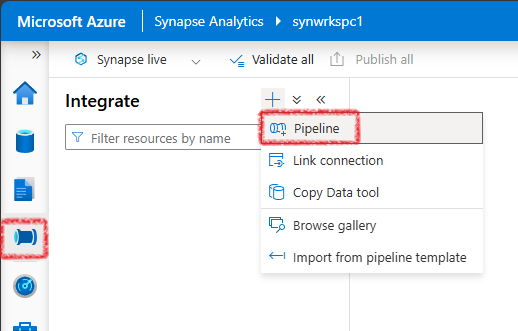
Add Copy Data Activity
Drag and drop the Copy Data activity onto the pipeline canvas. 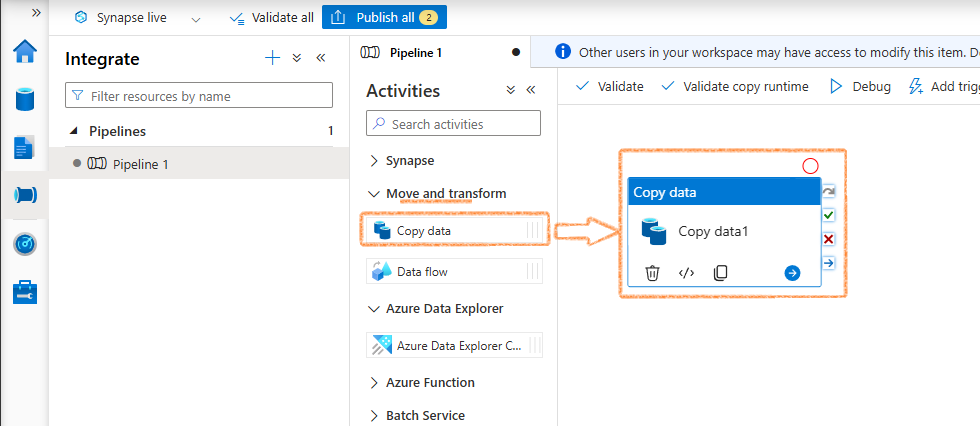
Configure the Source Dataset etc
-
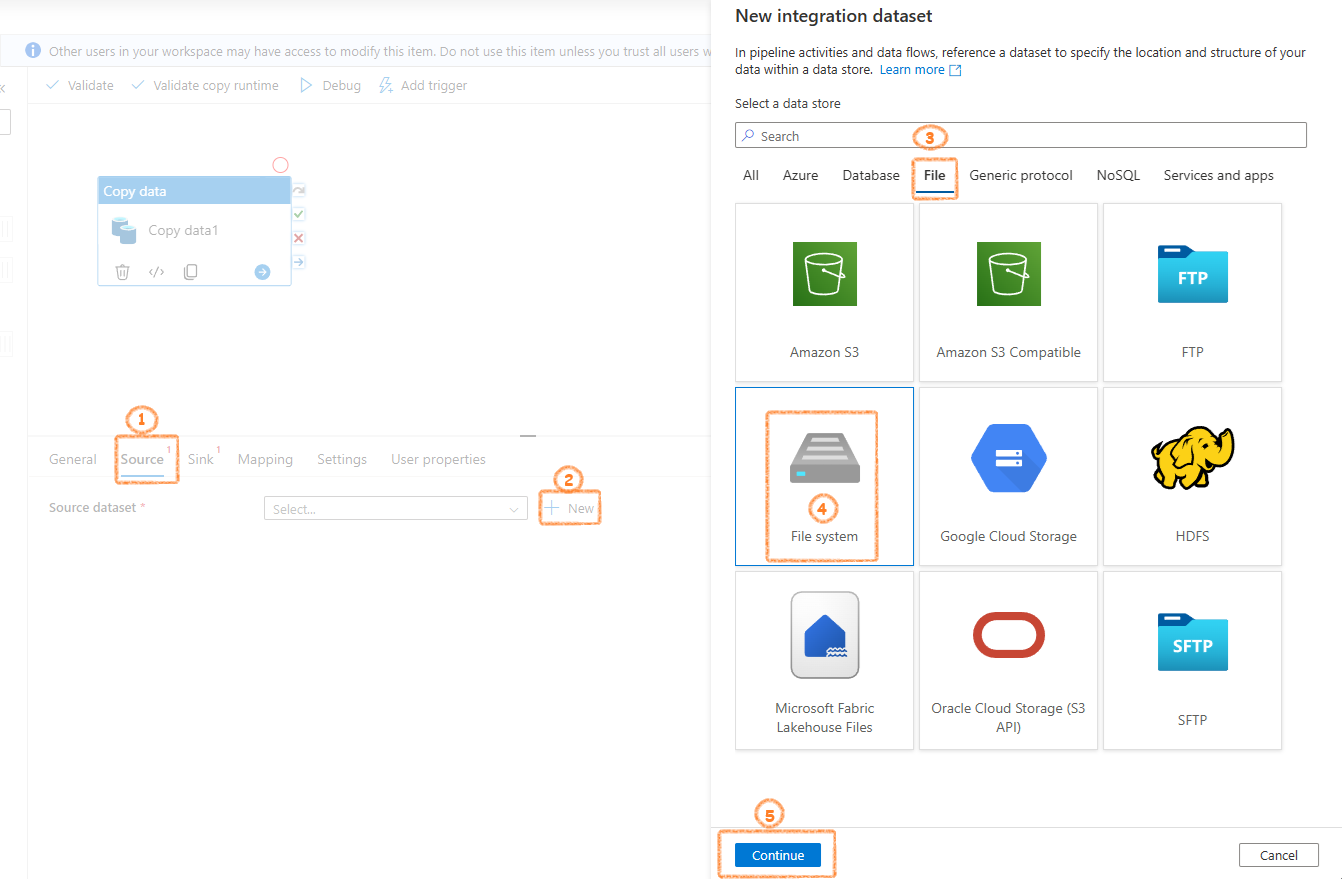
Choose dataset: Go to the Source tab, then Files, select File System, and click Continue.
-
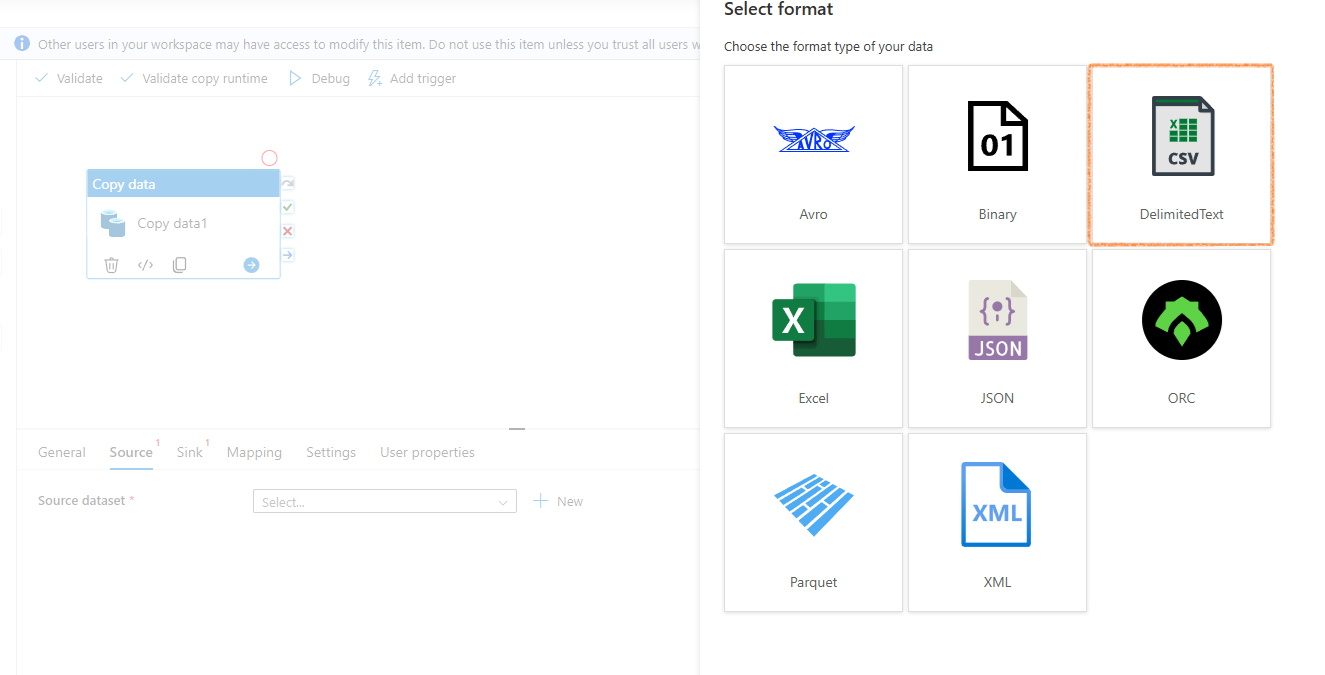
Choose File Format: Now, you have to select the format of the source files. We have CSV, so we will select Delimited Text.
-
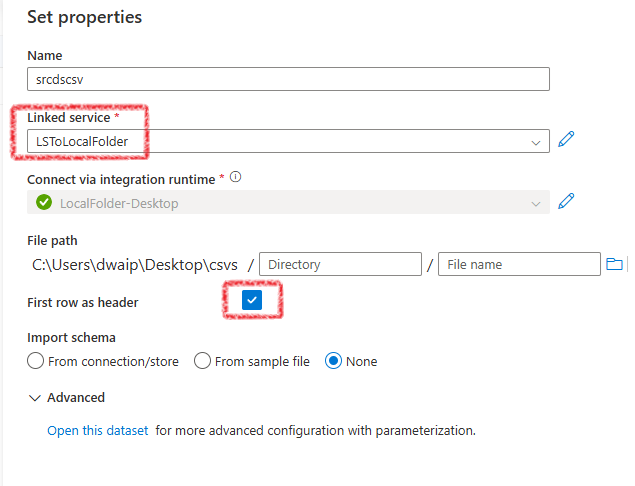
Select Linked Service: Next, select the Linked Service which we created earlier. This is the connection string that connects to the Laptops folder. You will see the File path and other details appear. Choose First row as header, which is usually the case for all CSVs.
-
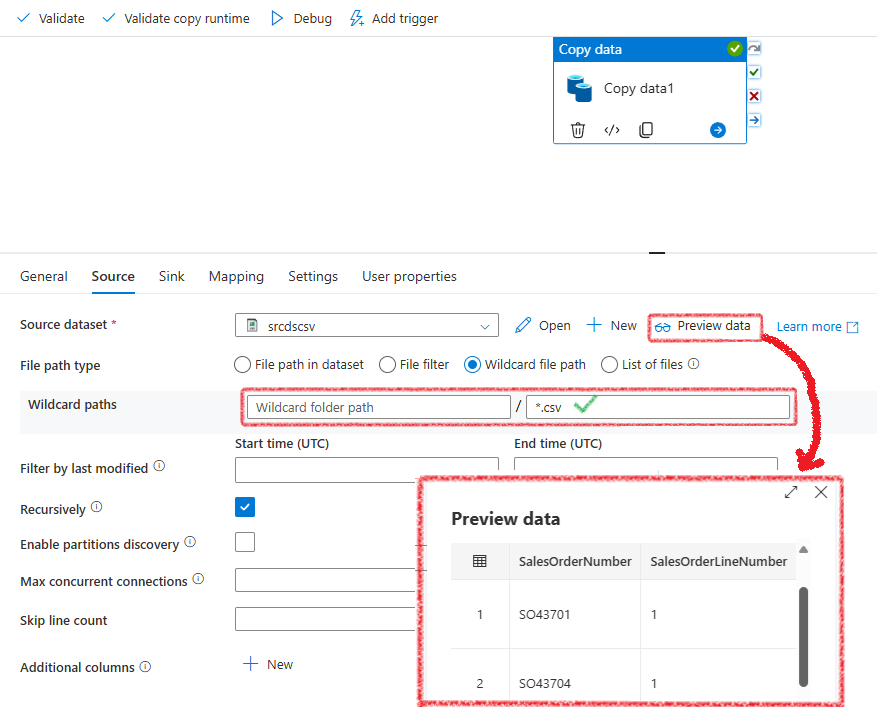
Preview data: If successful, you can preview the data. It will load one of the files to show you how the data looks, displaying a well-formatted table. Note, how we have seleccted *.csv to load all the csv files in the folder.
Configure the Sink Dataset
-
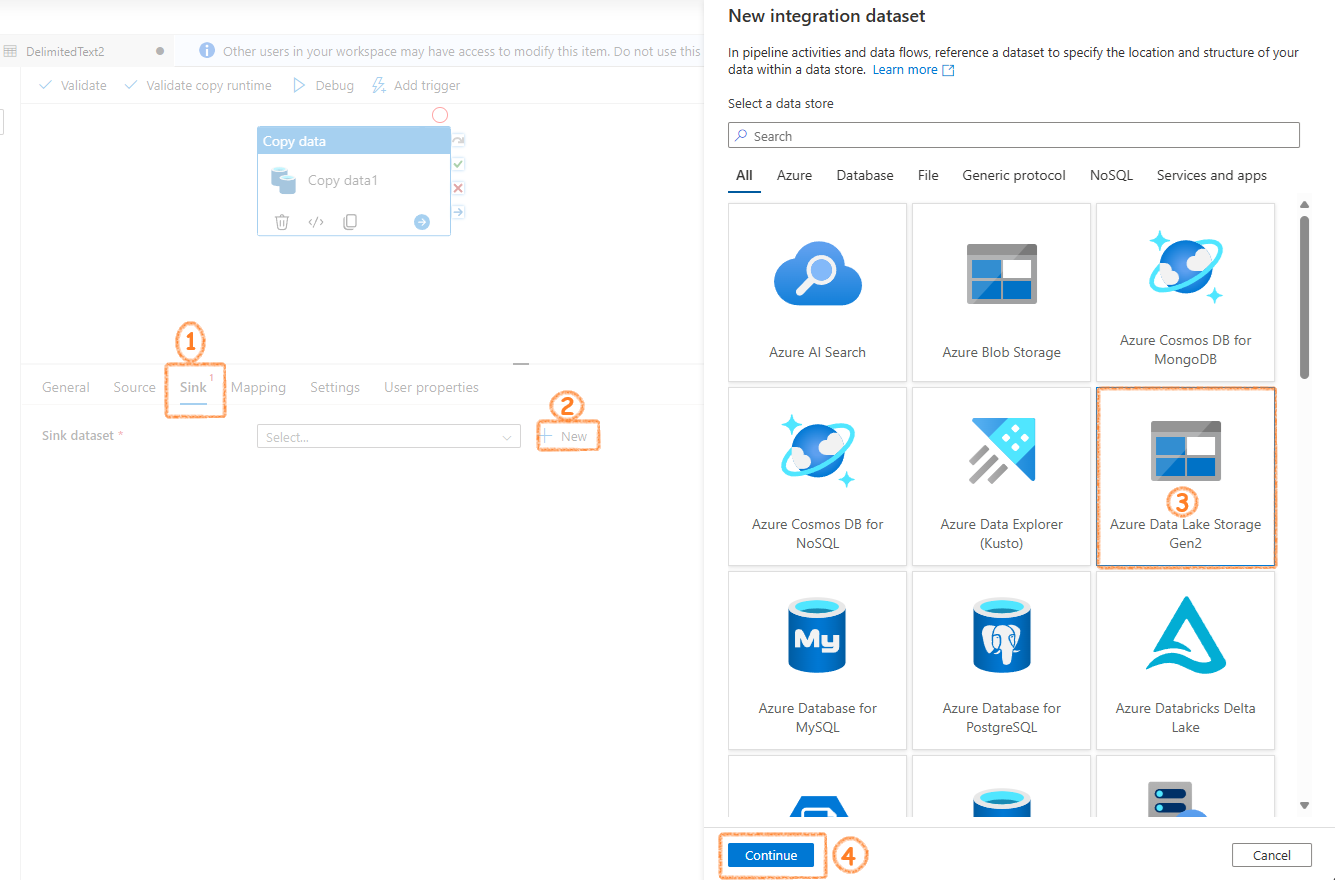
Select Integration Dataset: Go to the Sink tab, then select Azure Data Lake Storage Gen2.
-
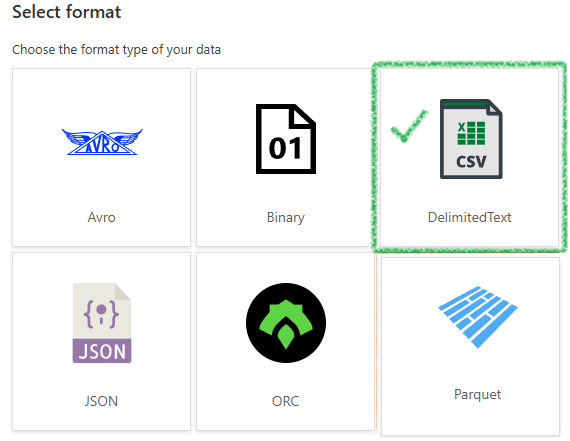
Selct File Format: Now, we need to provide the format in which the data will be copied to the destination. For this, select DelimitedText.
-
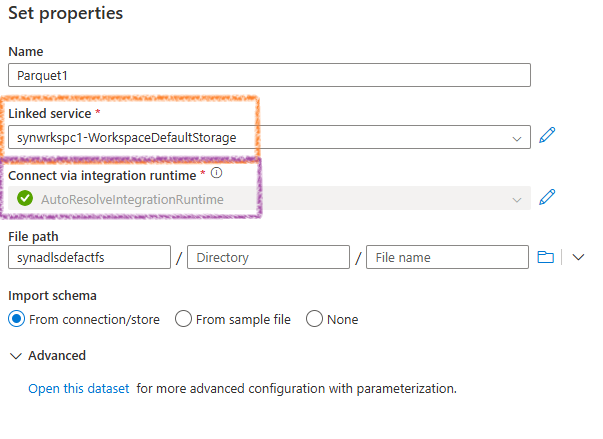
Select Linked Service & IR: Next, select the linked service which has the connection information to the container in ADLS where your data will be stored. You can choose any integration runtime. Here, I have chosen the default AutoResolveIntegrationRuntime as it is the simplest and comes factory-shipped with the Synapse workspace.
-
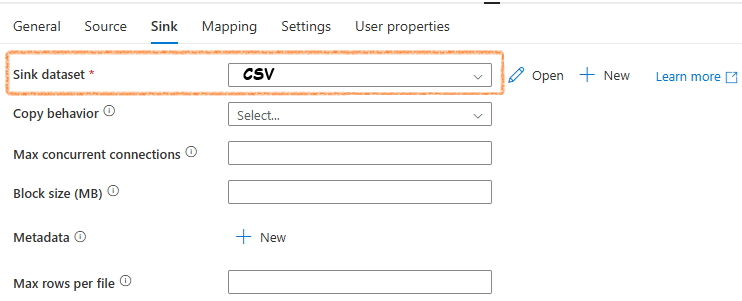
Choose other properties: Once the sink dataset is configured, you can choose other properties like Copy behavior, etc.
Execute the Pipeline
- Validate the Pipeline: Ensure all configurations are correct and validate the pipeline.
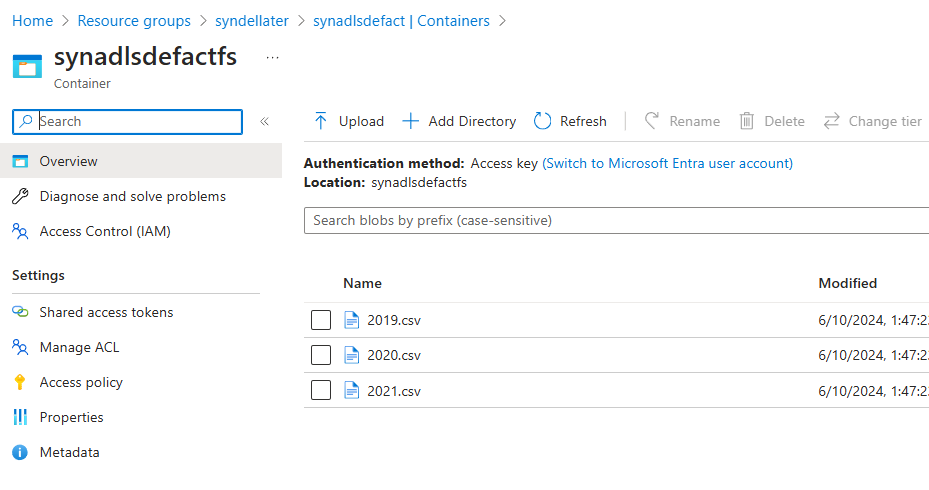
- Run the Pipeline: Execute the pipeline to start the data transfer from your laptop to ADLS. If it runs successfully you will see the data copied to your desired ADLS container.
Appendix
Manually Installating Integration Runtime
The integration runtime can also be downloaded and installed separately from the Microsoft software store. 
Install it on your local machine. The steps are straightforward. Just click through the installation process.
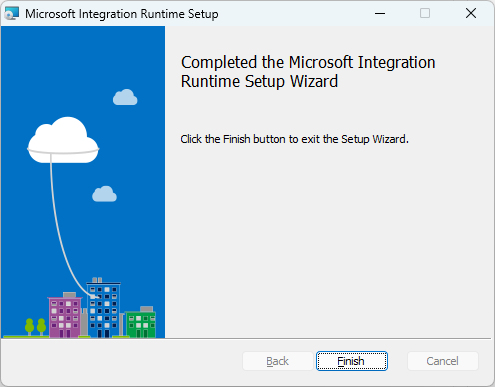
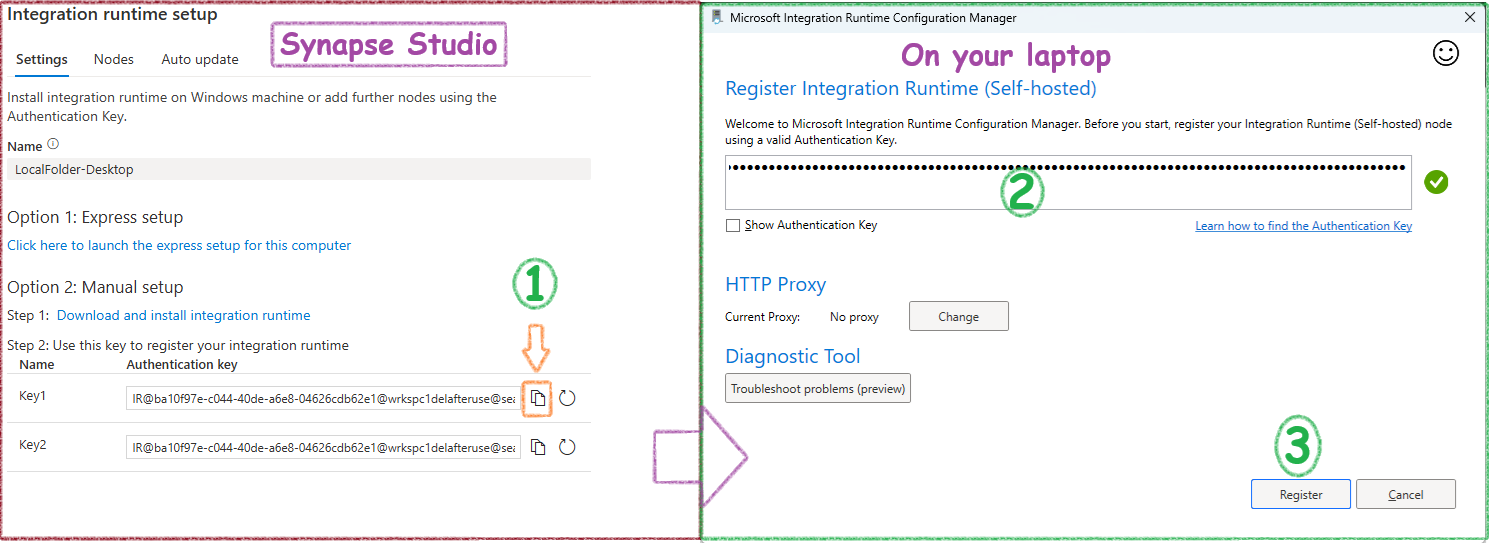
In the final step, you will need to register the Runtime by copying and pasting the authentication key from the Synapse portal. 