Table of contents
Azure Pipelines
In Azure DevOps, Azure Pipelines are used to automatically build, test, and deploy any project to Dev, UAT, or PROD environments. This is how CI/CD is implemented using Azure Pipelines.
You can use Azure Pipelines for any type of project, be it C#, Python, iOS, Android, etc. Azure Pipeline is written in a YAML file, called azure-pipelines.yml, in your VS project folder.
Azure Pipelines Agents
When a pipeline runs, it creates one or more jobs. These jobs need ‘a place’ to run. This place is the agent. The agent is a machine, VM, or cloud environment with the agent software installed, where the jobs can execute.
There are three types of agents:
- Microsoft-hosted agent
- Self-hosted agent
- Azure VM agents
The agent is where the jobs for the pipelines run.
Create a Pipeline in Azure DevOps
What You Need
- GitHub account: Create a free repository on GitHub.
- Azure DevOps organization: Create one for free. If your team already has one, ensure you’re an administrator of the Azure DevOps project you want to use.
- Ability to run pipelines on Microsoft-hosted agents: Your Azure DevOps organization must have access to Microsoft-hosted parallel jobs. You can either purchase a parallel job or request a free grant.
Steps to Create a Pipeline
- Fork the Repository
- Open this link and click on Fork.

- Click on Create fork.
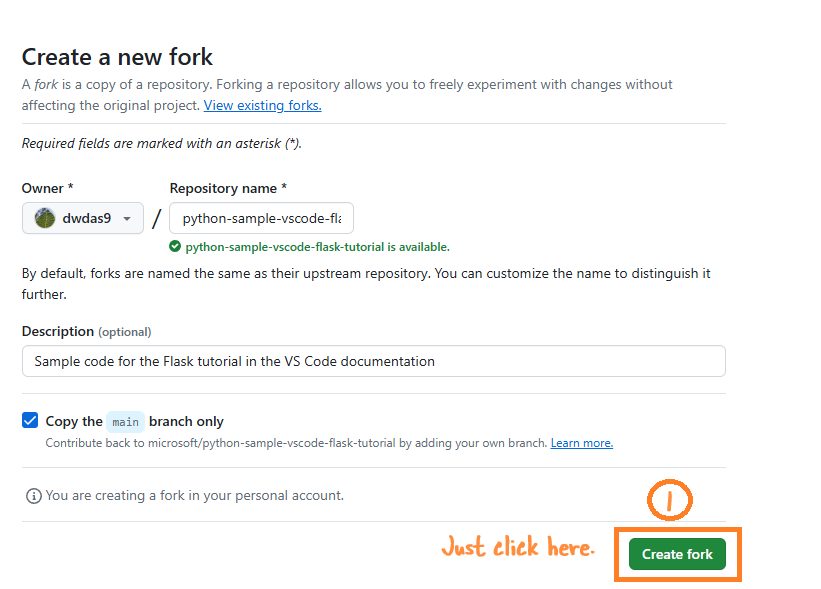
- Open this link and click on Fork.
- Sign in to Azure DevOps
- Sign in to your Azure DevOps organization and go to your project.
- Create a New Pipeline
- Go to Pipelines, and then select New pipeline or Create pipeline if it’s your first pipeline.
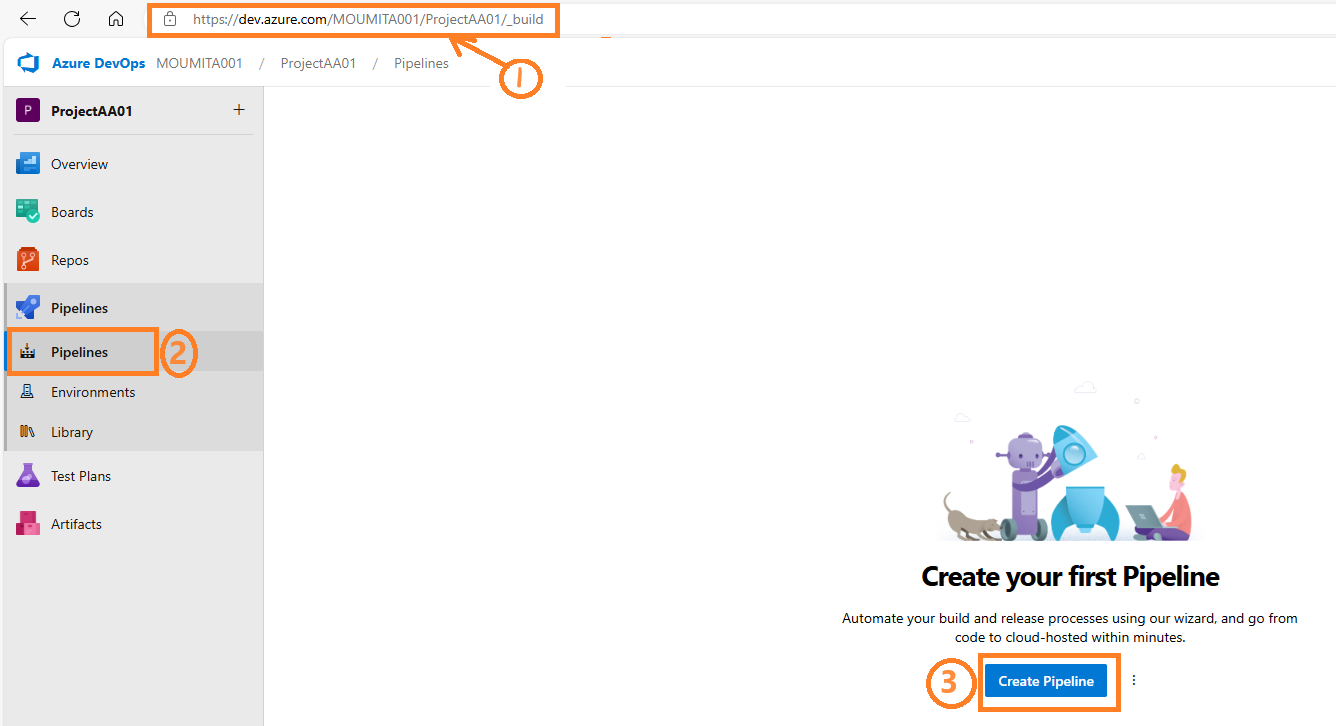
- Go to Pipelines, and then select New pipeline or Create pipeline if it’s your first pipeline.
- Connect to GitHub
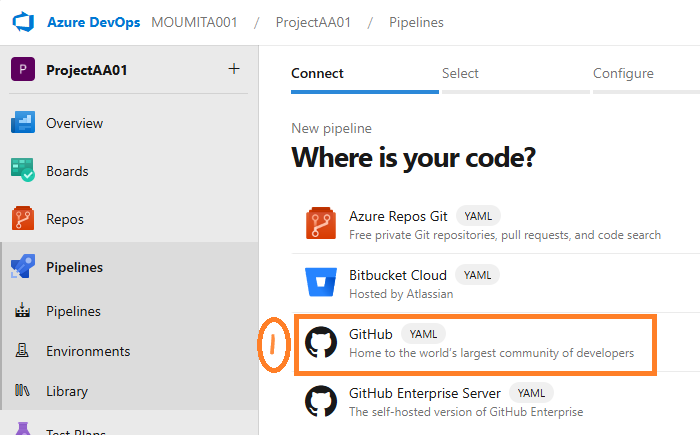
- Follow the steps in the wizard by first selecting GitHub as the location of your source code.
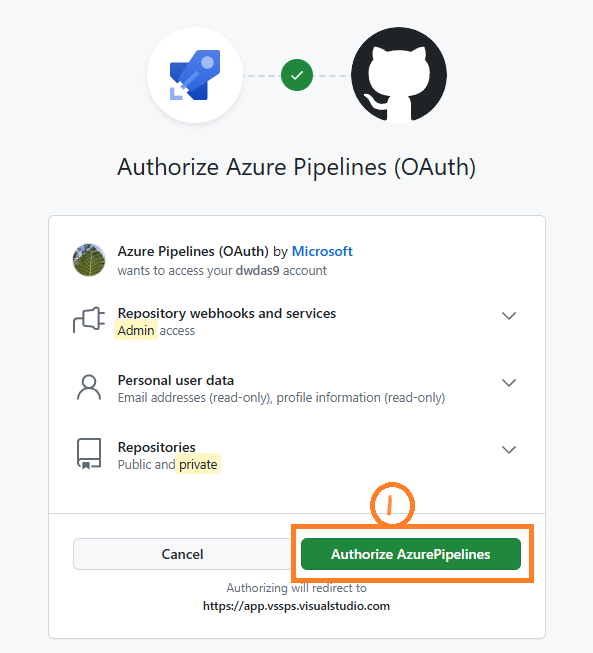
- You might be redirected to GitHub to install the Azure Pipelines app. If so, select Approve & install.
- Follow the steps in the wizard by first selecting GitHub as the location of your source code.
- Configure the Pipeline
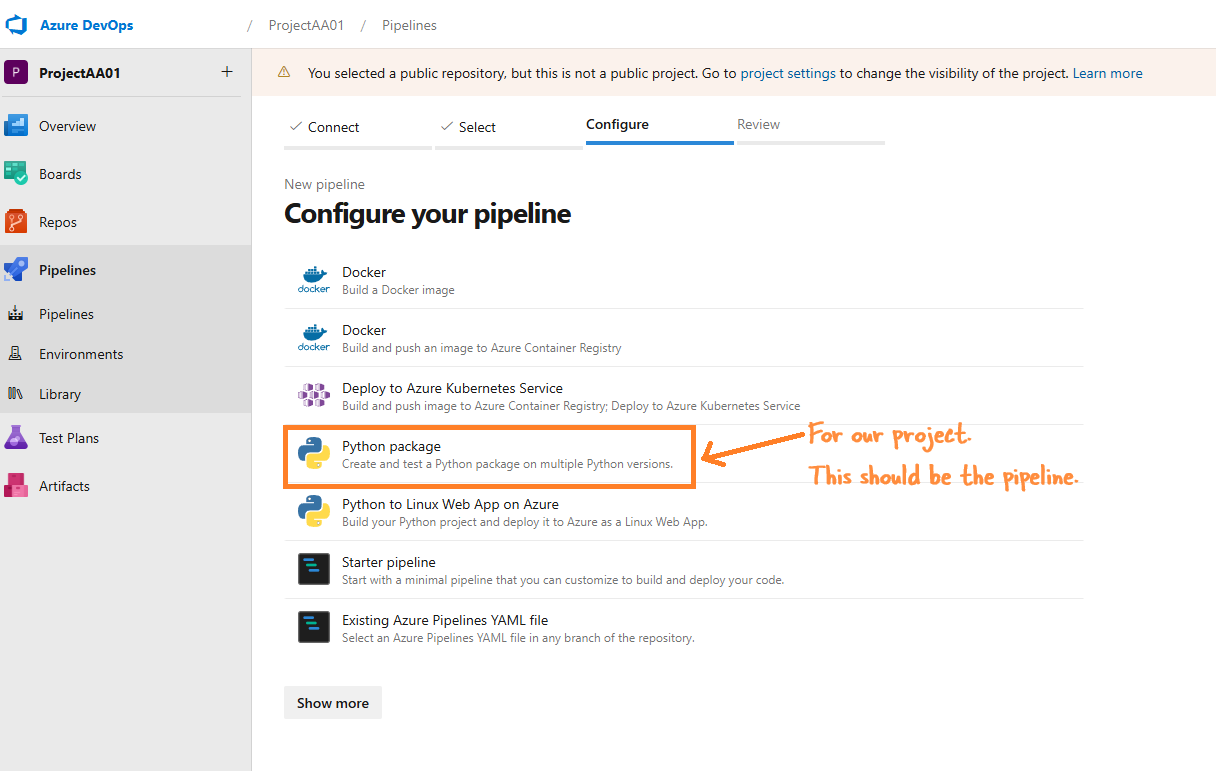
- Azure Pipelines will analyze your repository and recommend the Python package pipeline template.
- When your new pipeline appears, check the YAML to see what it does. When you’re ready, select Save and run.
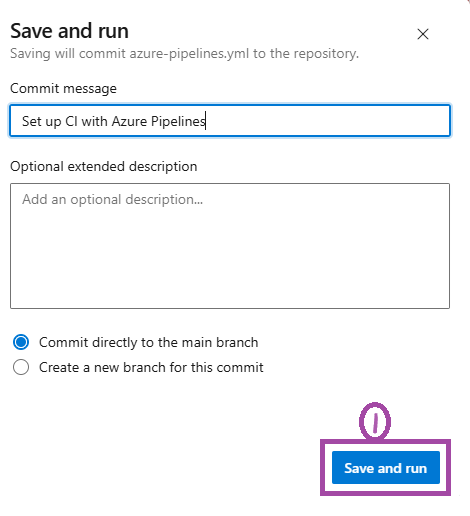
- You’ll be prompted to commit a new
azure-pipelines.ymlfile to your repository. After you’re happy with the message, select Save and run again.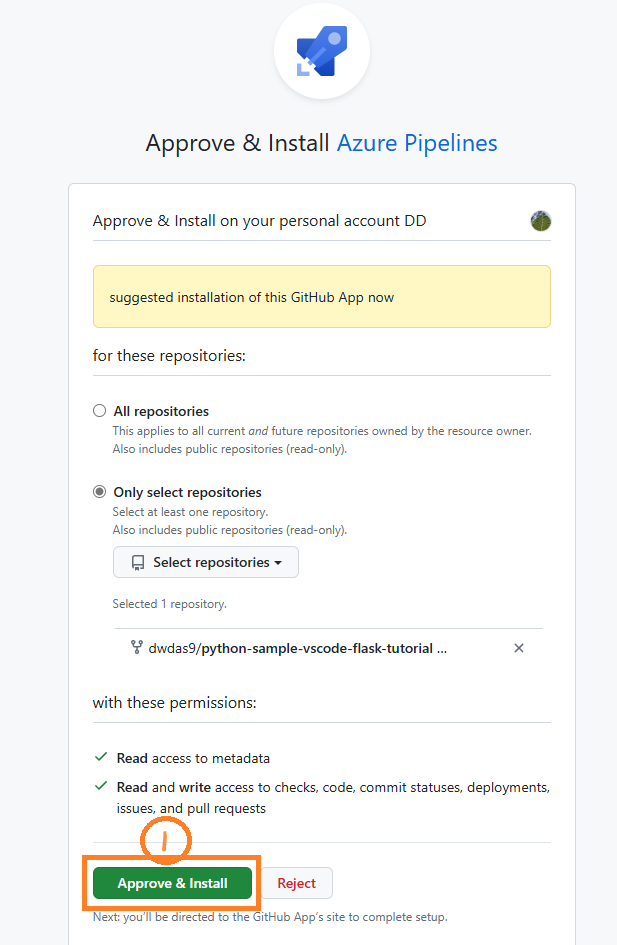
- Watch Your Pipeline Run
- If you want to watch your pipeline in action, select the build job.
You have now created and ran a pipeline that Azure automatically created for you, as your code was a good match for the Python package template. You now have a working YAML pipeline (azure-pipelines.yml) in your repository that’s ready for you to customize!
Editing Your Pipeline
- When you’re ready to make changes to your pipeline, select it in the Pipelines page, and then edit the
azure-pipelines.ymlfile.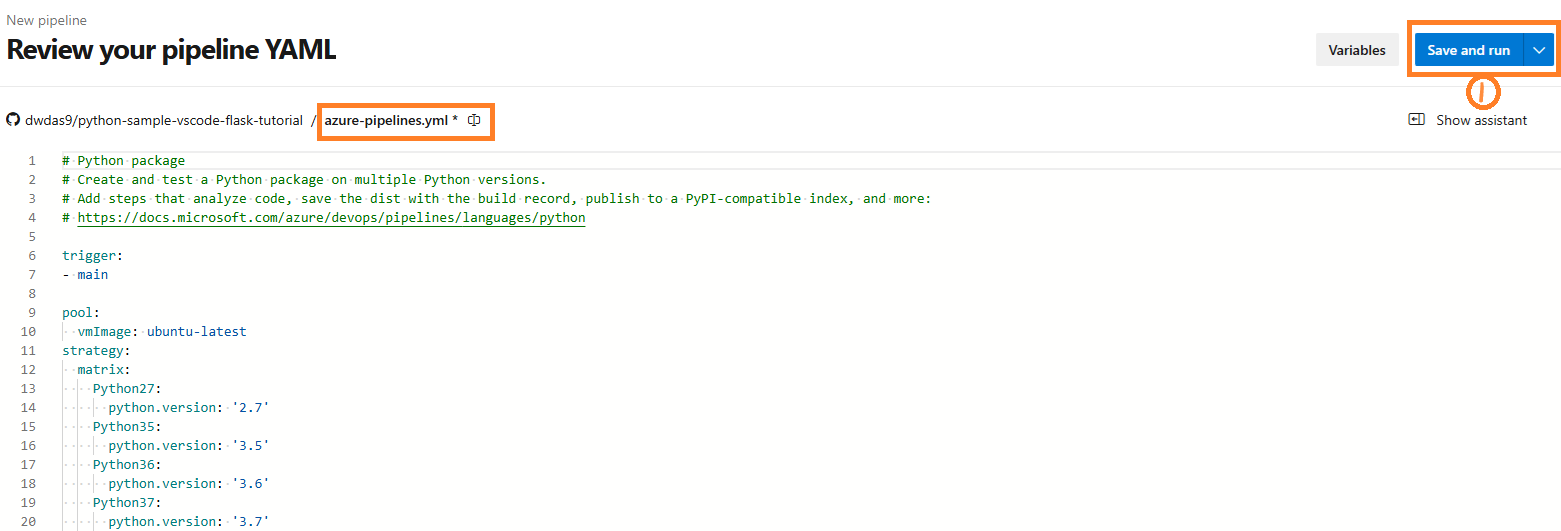
No Hosted Parallelism Available
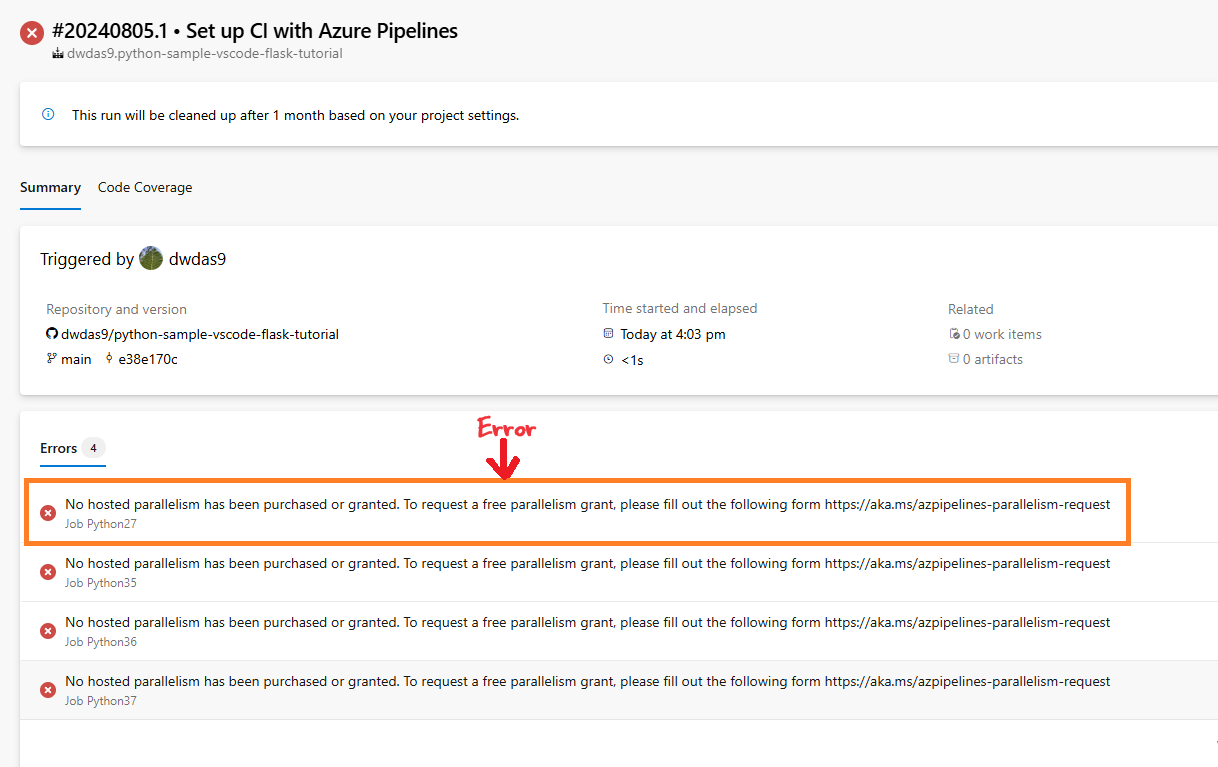
This means you haven’t purchased Parallelism. You can do this:
- Request Free Parallelism: Request Parallelism.
- Check Usage: Go to your Azure DevOps settings and check if all your parallel jobs are in use.
- Buy More Parallelism: If needed, buy more parallelism from the billing section in Azure DevOps.
- Set Up Self-hosted Agents: If you have your own resources, set up self-hosted agents to run your pipelines.
You can run the Azure Pipeline agent on your own computer and run the pipeline on a self-hosted Azure Pipeline Agent: Learn more.