Background
GitHub Actions Workflows are the core of GitHub CI/CD. You can set them up easily. VS Code has many extensions for GitHub. In this article, I will show how to create a simple GitHub Actions Workflow. It will help you understand the flow. Later using similar steps you can create complex Action Workflows. Let's get started.
Create an End-to-End GitHub Actions Workflow Using VS Code
Create a New Repository Using GitHub Desktop
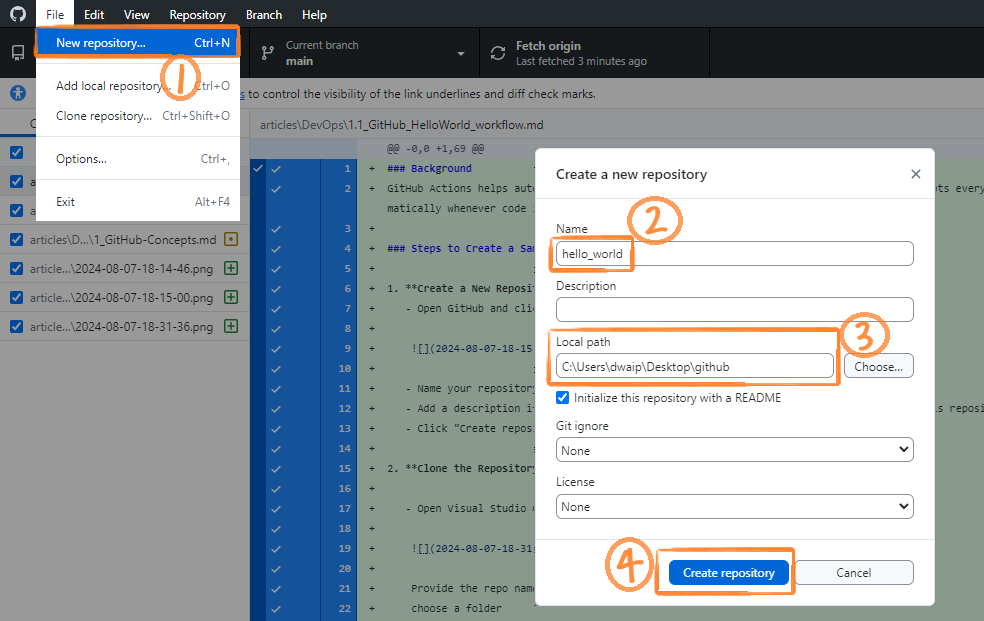
- Open GitHub Desktop. Click on New repository. Provide a name for your repository, check the local path, and click on Create repository.
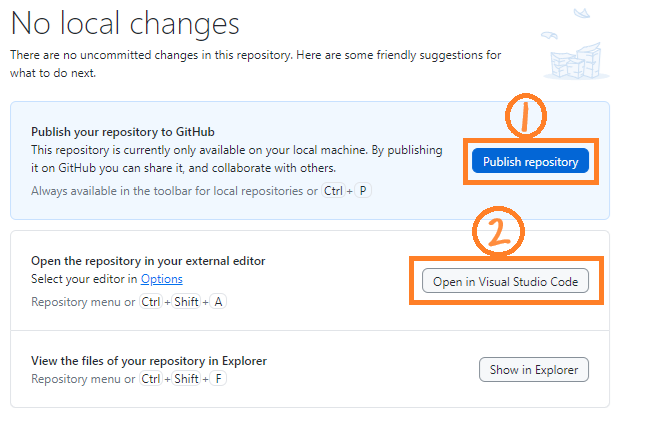
- Click on Publish repository. Then Click on Open in Visual Studio Code.
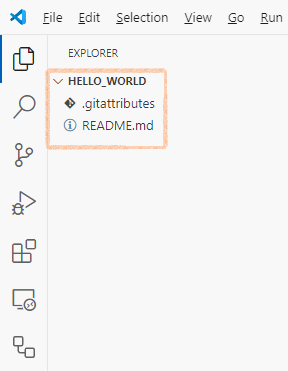
- In the VS Code you will be able to see your folder .gitattributes file
Set Up the GitHub Actions Workflow in VS Code
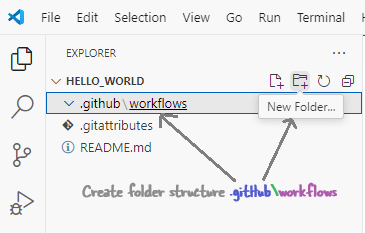
- Create Folder Structure:
- In VS Code, click on the create folder icon and create a
.githubfolder. - Inside the
.githubfolder, create another folder namedworkflows.
- Create Workflow File:
- Inside the
workflowsfolder, create a file namedhello-github-actions.yml. - Add the following code to
hello-github-actions.yml:
Create a Python Script
- In the root of your repository, create a new file named
hello.py. - Add the following code to
hello.py: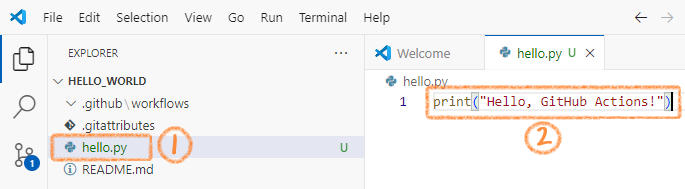
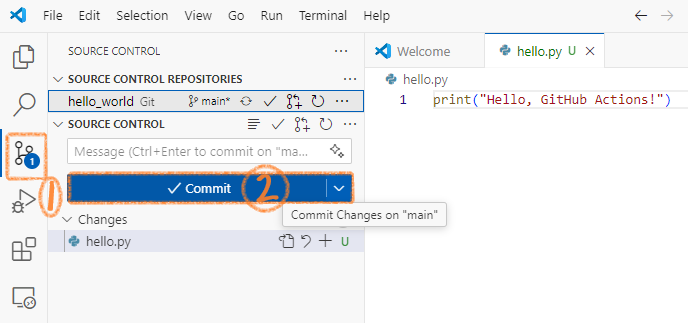
Commit and Push the Changes
- Click on the source control icon in VS Code.
- Uncomment or Write a commit message (e.g., "This is a message bla bla bla").
- Click on Commit to commit the changes.
- Click on Push to push the changes to GitHub. This will trigger the workflow.
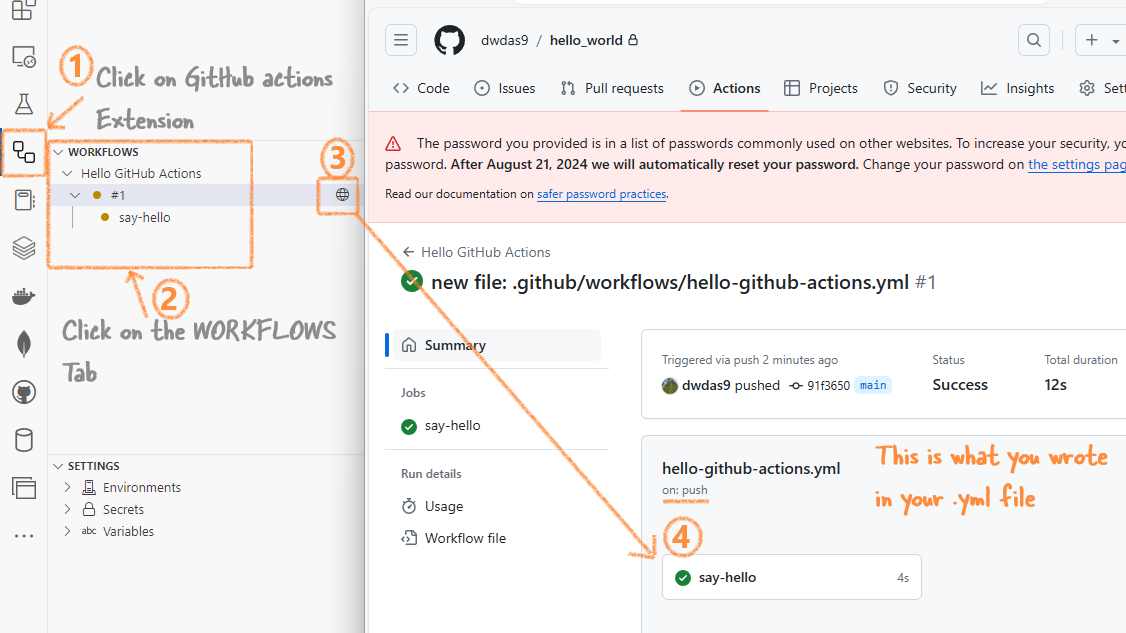
Check the Workflow Execution
- In VS Code, click on the GitHub Actions Extension in the left pane. This will show you the GitHub Actions Workflow that you created.
- You can click on the globe icon to see the workflow directly on GitHub.
Summary
Well, this was a hand-holding article. You can do a lot more with GitHub Actions workflows.