Installing and Running Stable Diffusion Locally on Mac M3 Pro/Max
In this guide, I’ll show you how to run Stable Diffusion on your Mac M3 Pro/Max using the AUTOMATIC1111 Web UI. The process is straightforward: clone the AUTOMATIC1111/stable-diffusion-webui repository, then run the provided webui.sh script.
Prerequisites
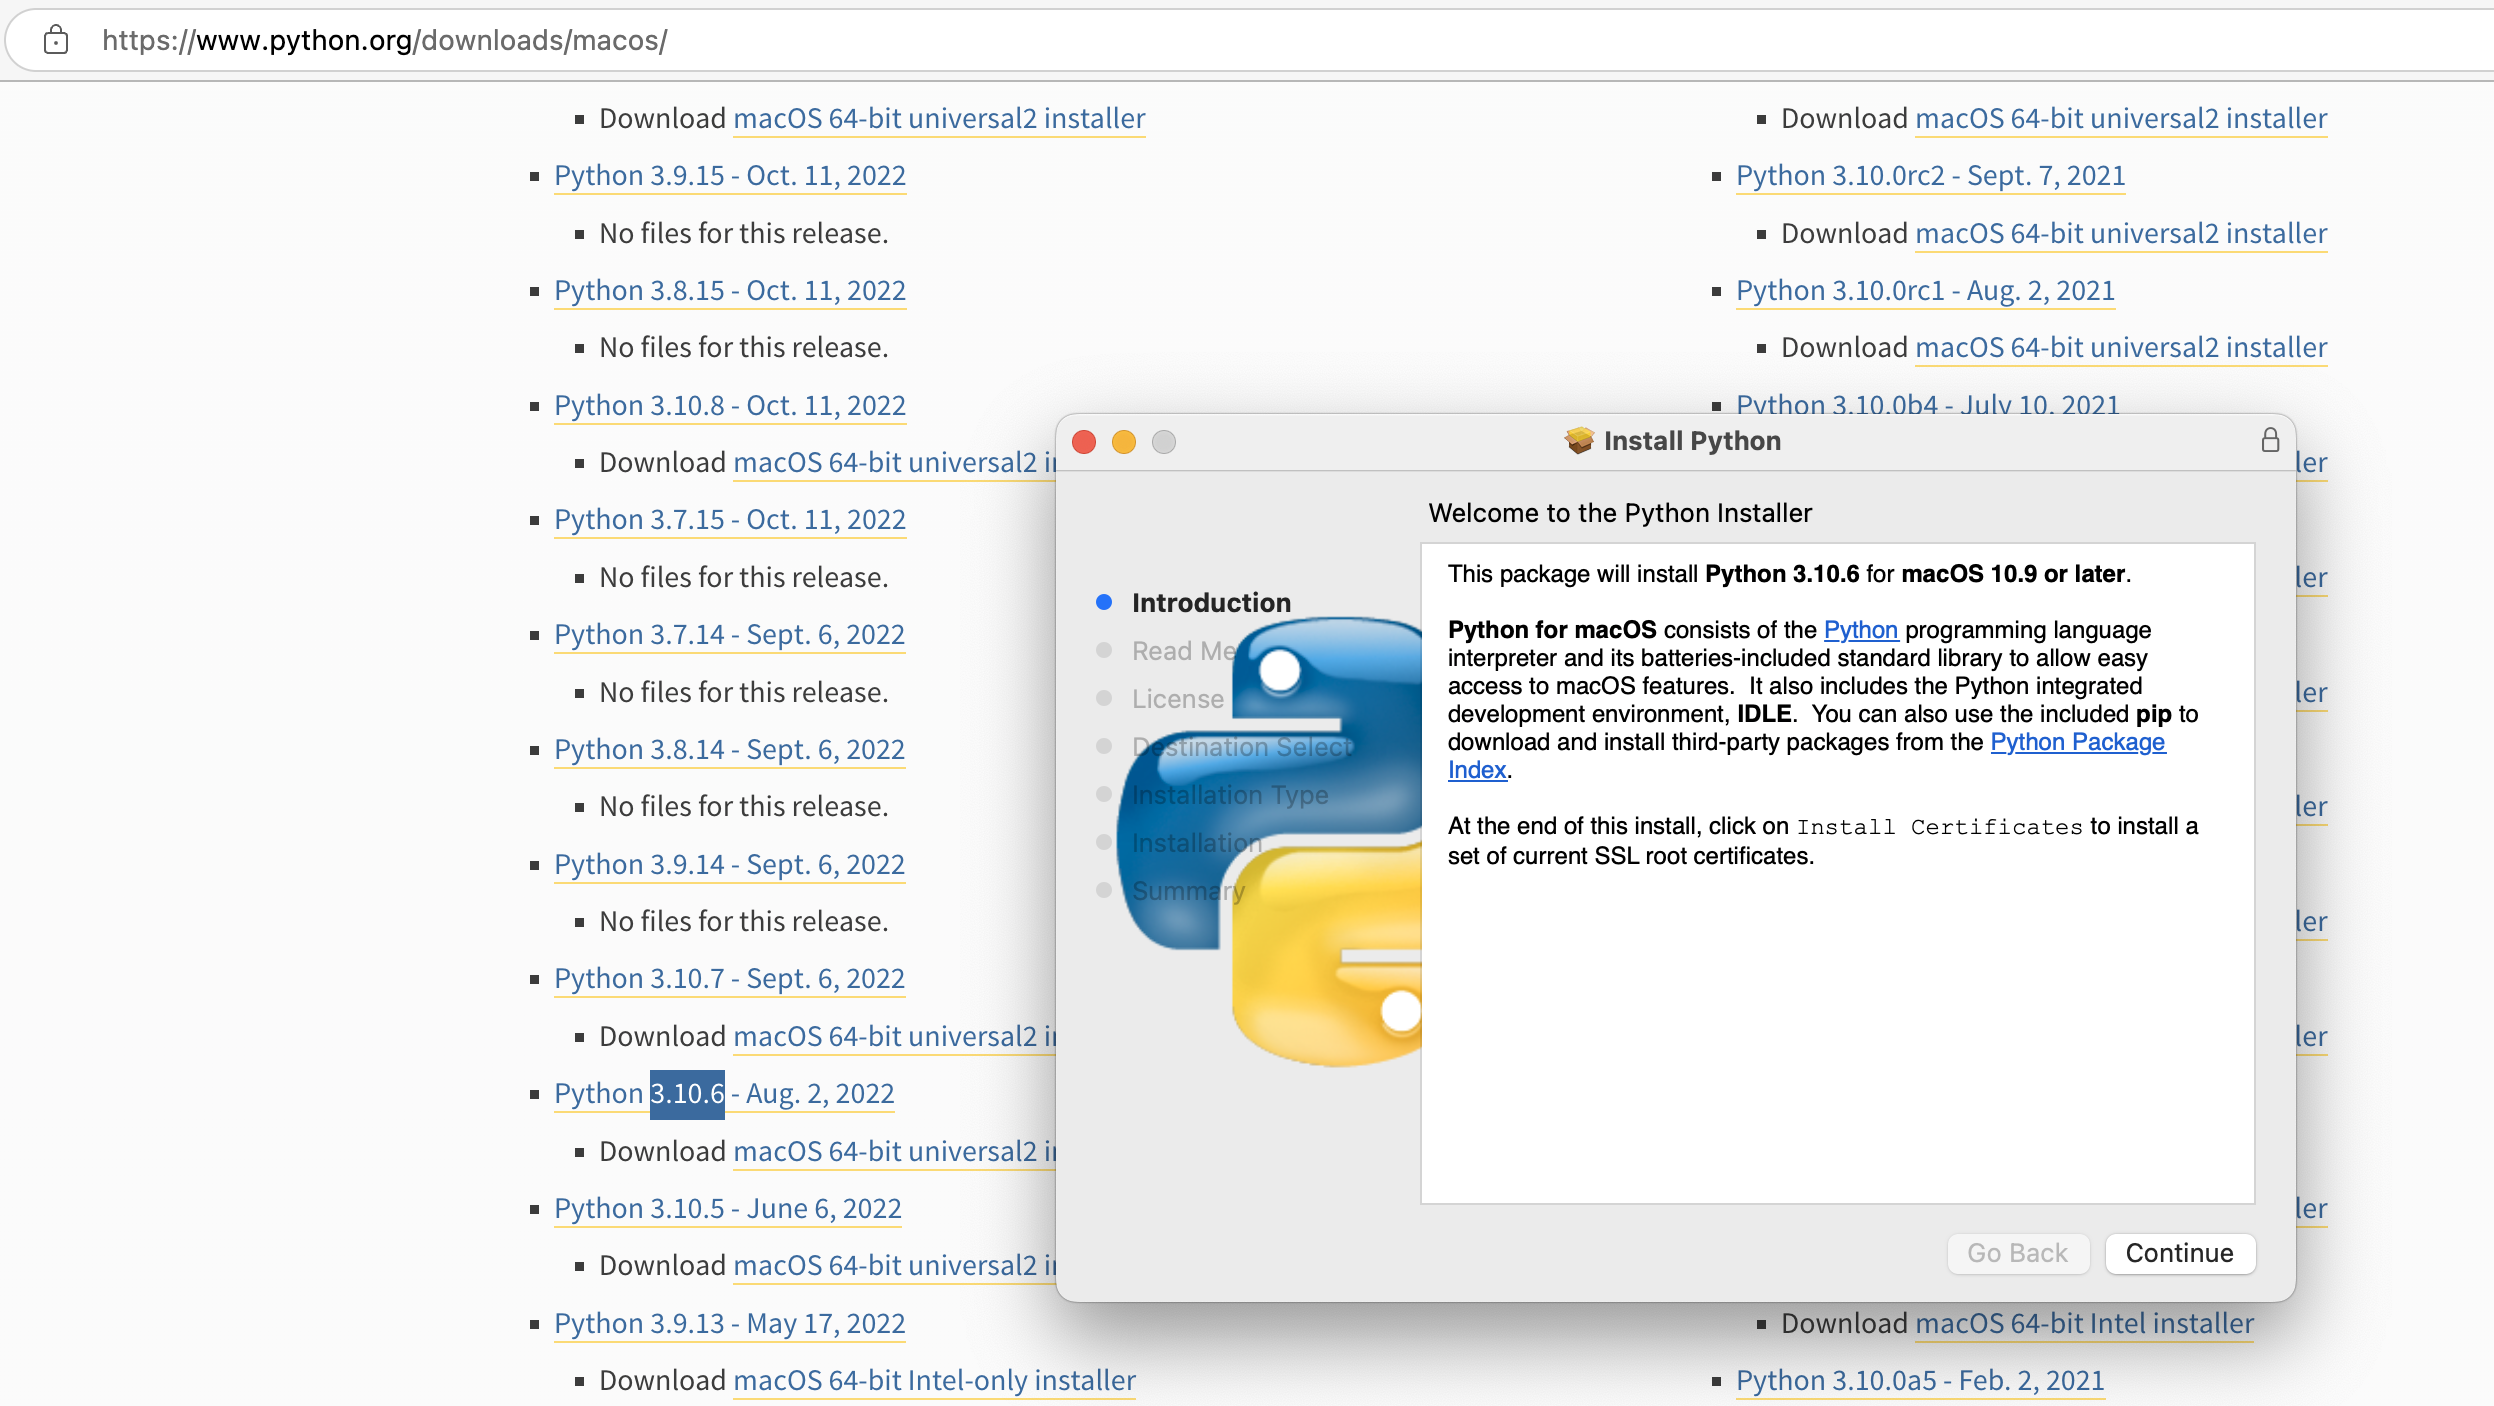
You will need Git and Python 3.10.6. Other Python versions might work, but 3.10.6 is recommended to ensure all scripts and libraries run smoothly.
Step 1: Clone the Repository
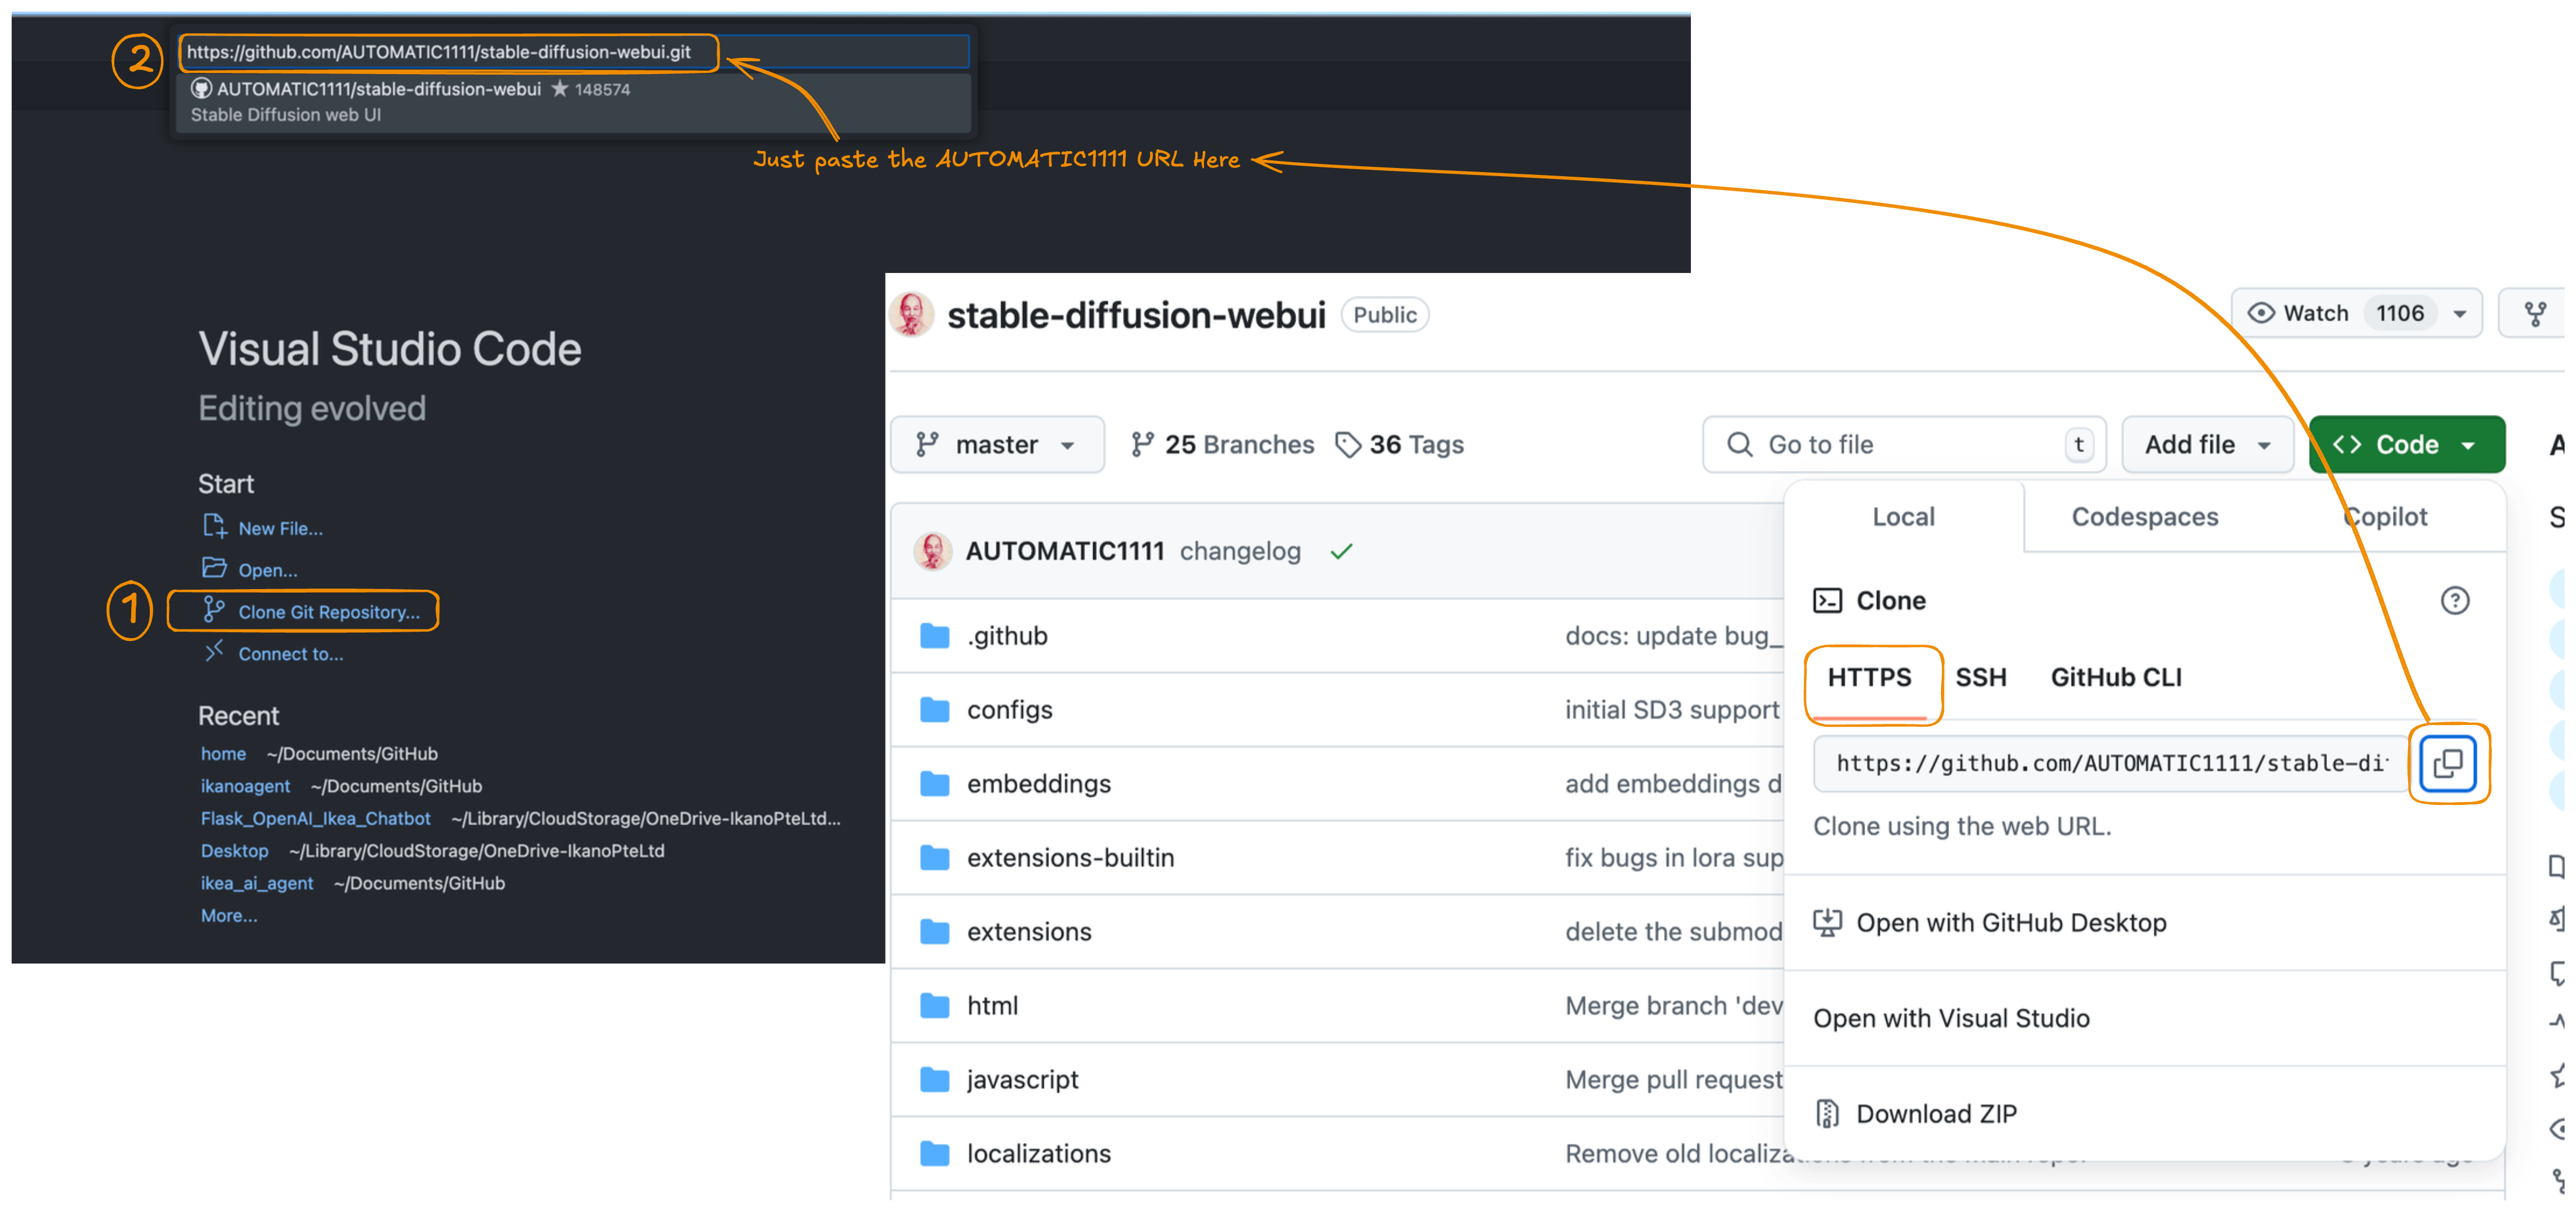
Clone the AUTOMATIC1111/stable-diffusion-webui repository in a convenient folder. Below is a screenshot showing this in VS Code:
Step 2: Select the Python Interpreter
In VS Code, set Python 3.10.6 as your interpreter. This ensures any commands or virtual environments you create use the correct version.

Step 3: Open the Terminal
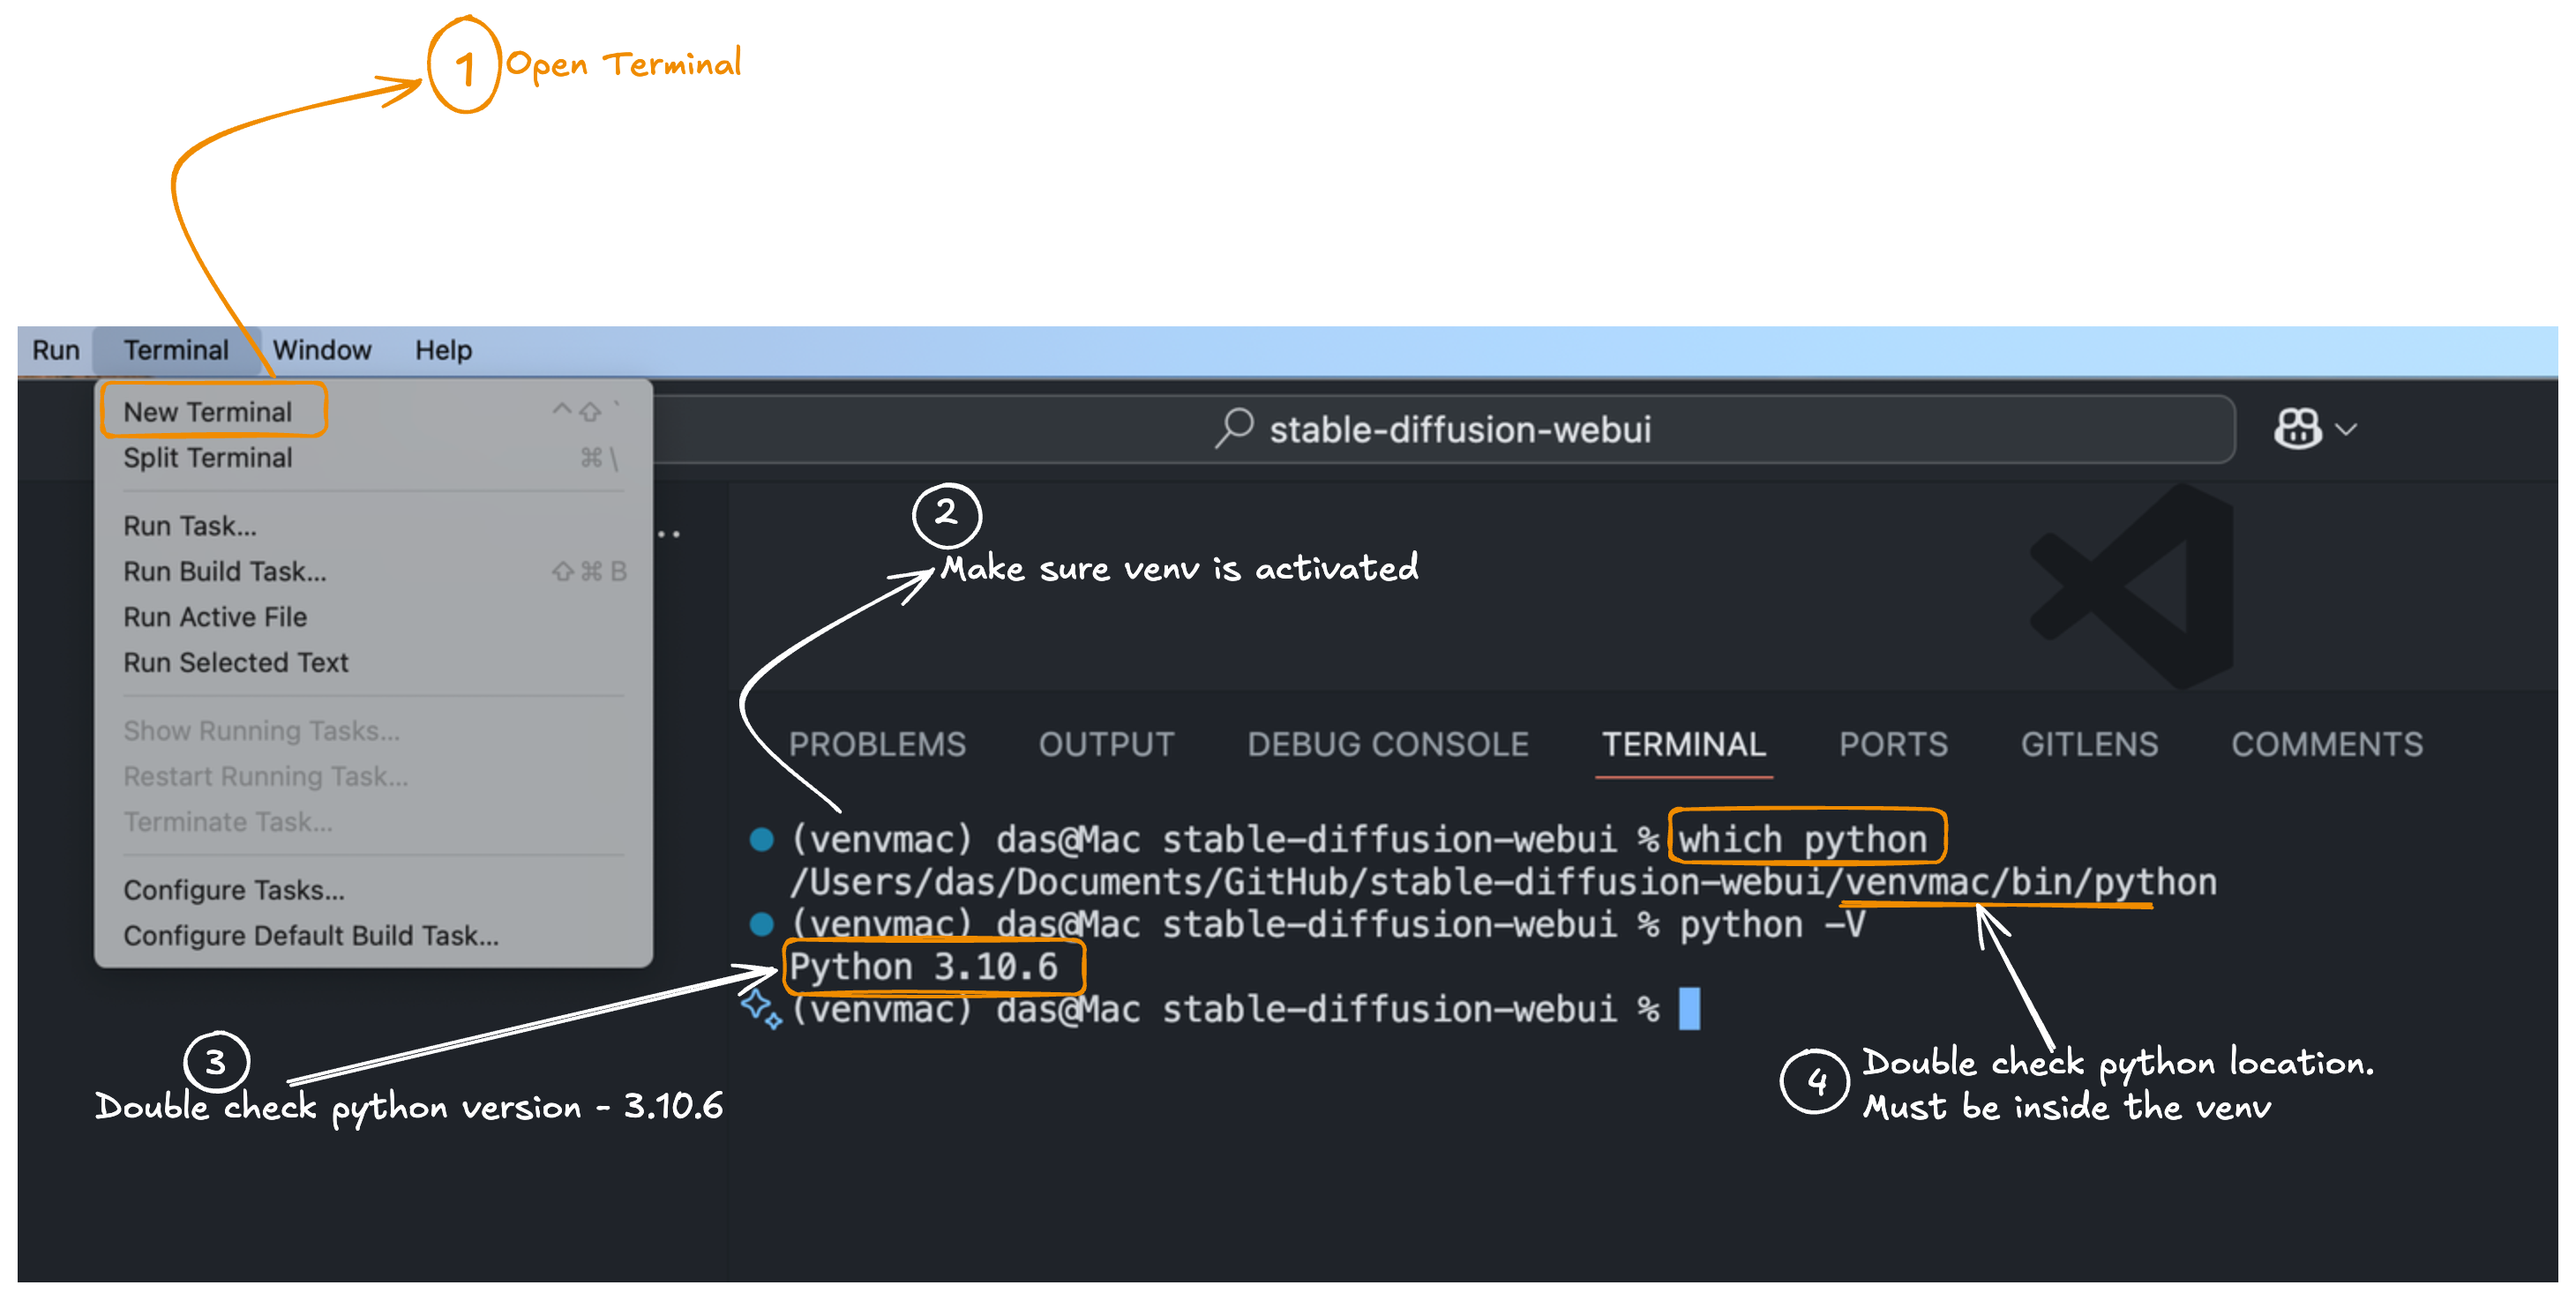
Open the integrated Terminal in VS Code and navigate to the folder containing the cloned repository.
Step 4 (Optional): Create a Virtual Environment
The webui.sh script will automatically set up a virtual environment if you don’t have one. However, you can create one manually:
After activating it, (venv) appears in your terminal prompt. Make sure you’re using Python 3.10.6 for this step.
Step 5: Place Your Model Checkpoint
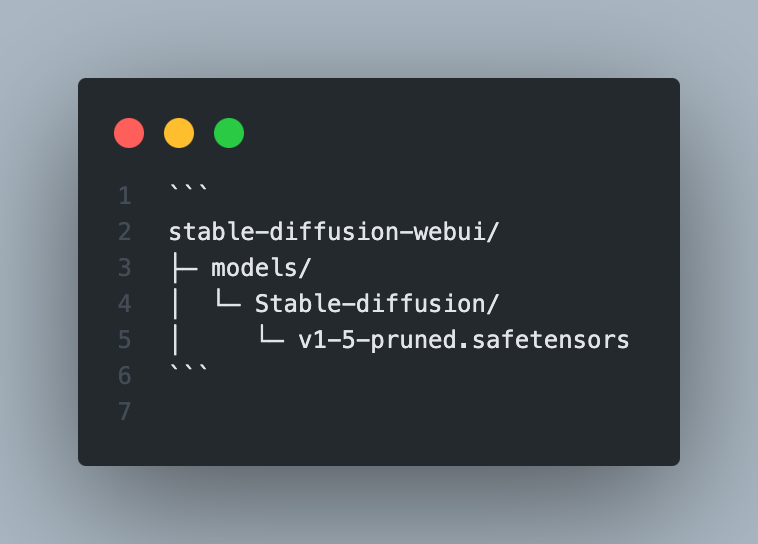
Download a model from Hugging Face (for example, Stable Diffusion v1.5) and save the file (.safetensors or .ckpt) into:
Your folder might look like this:
Step 6: Run the webui.sh Script
Make the startup script executable if needed, then run it:
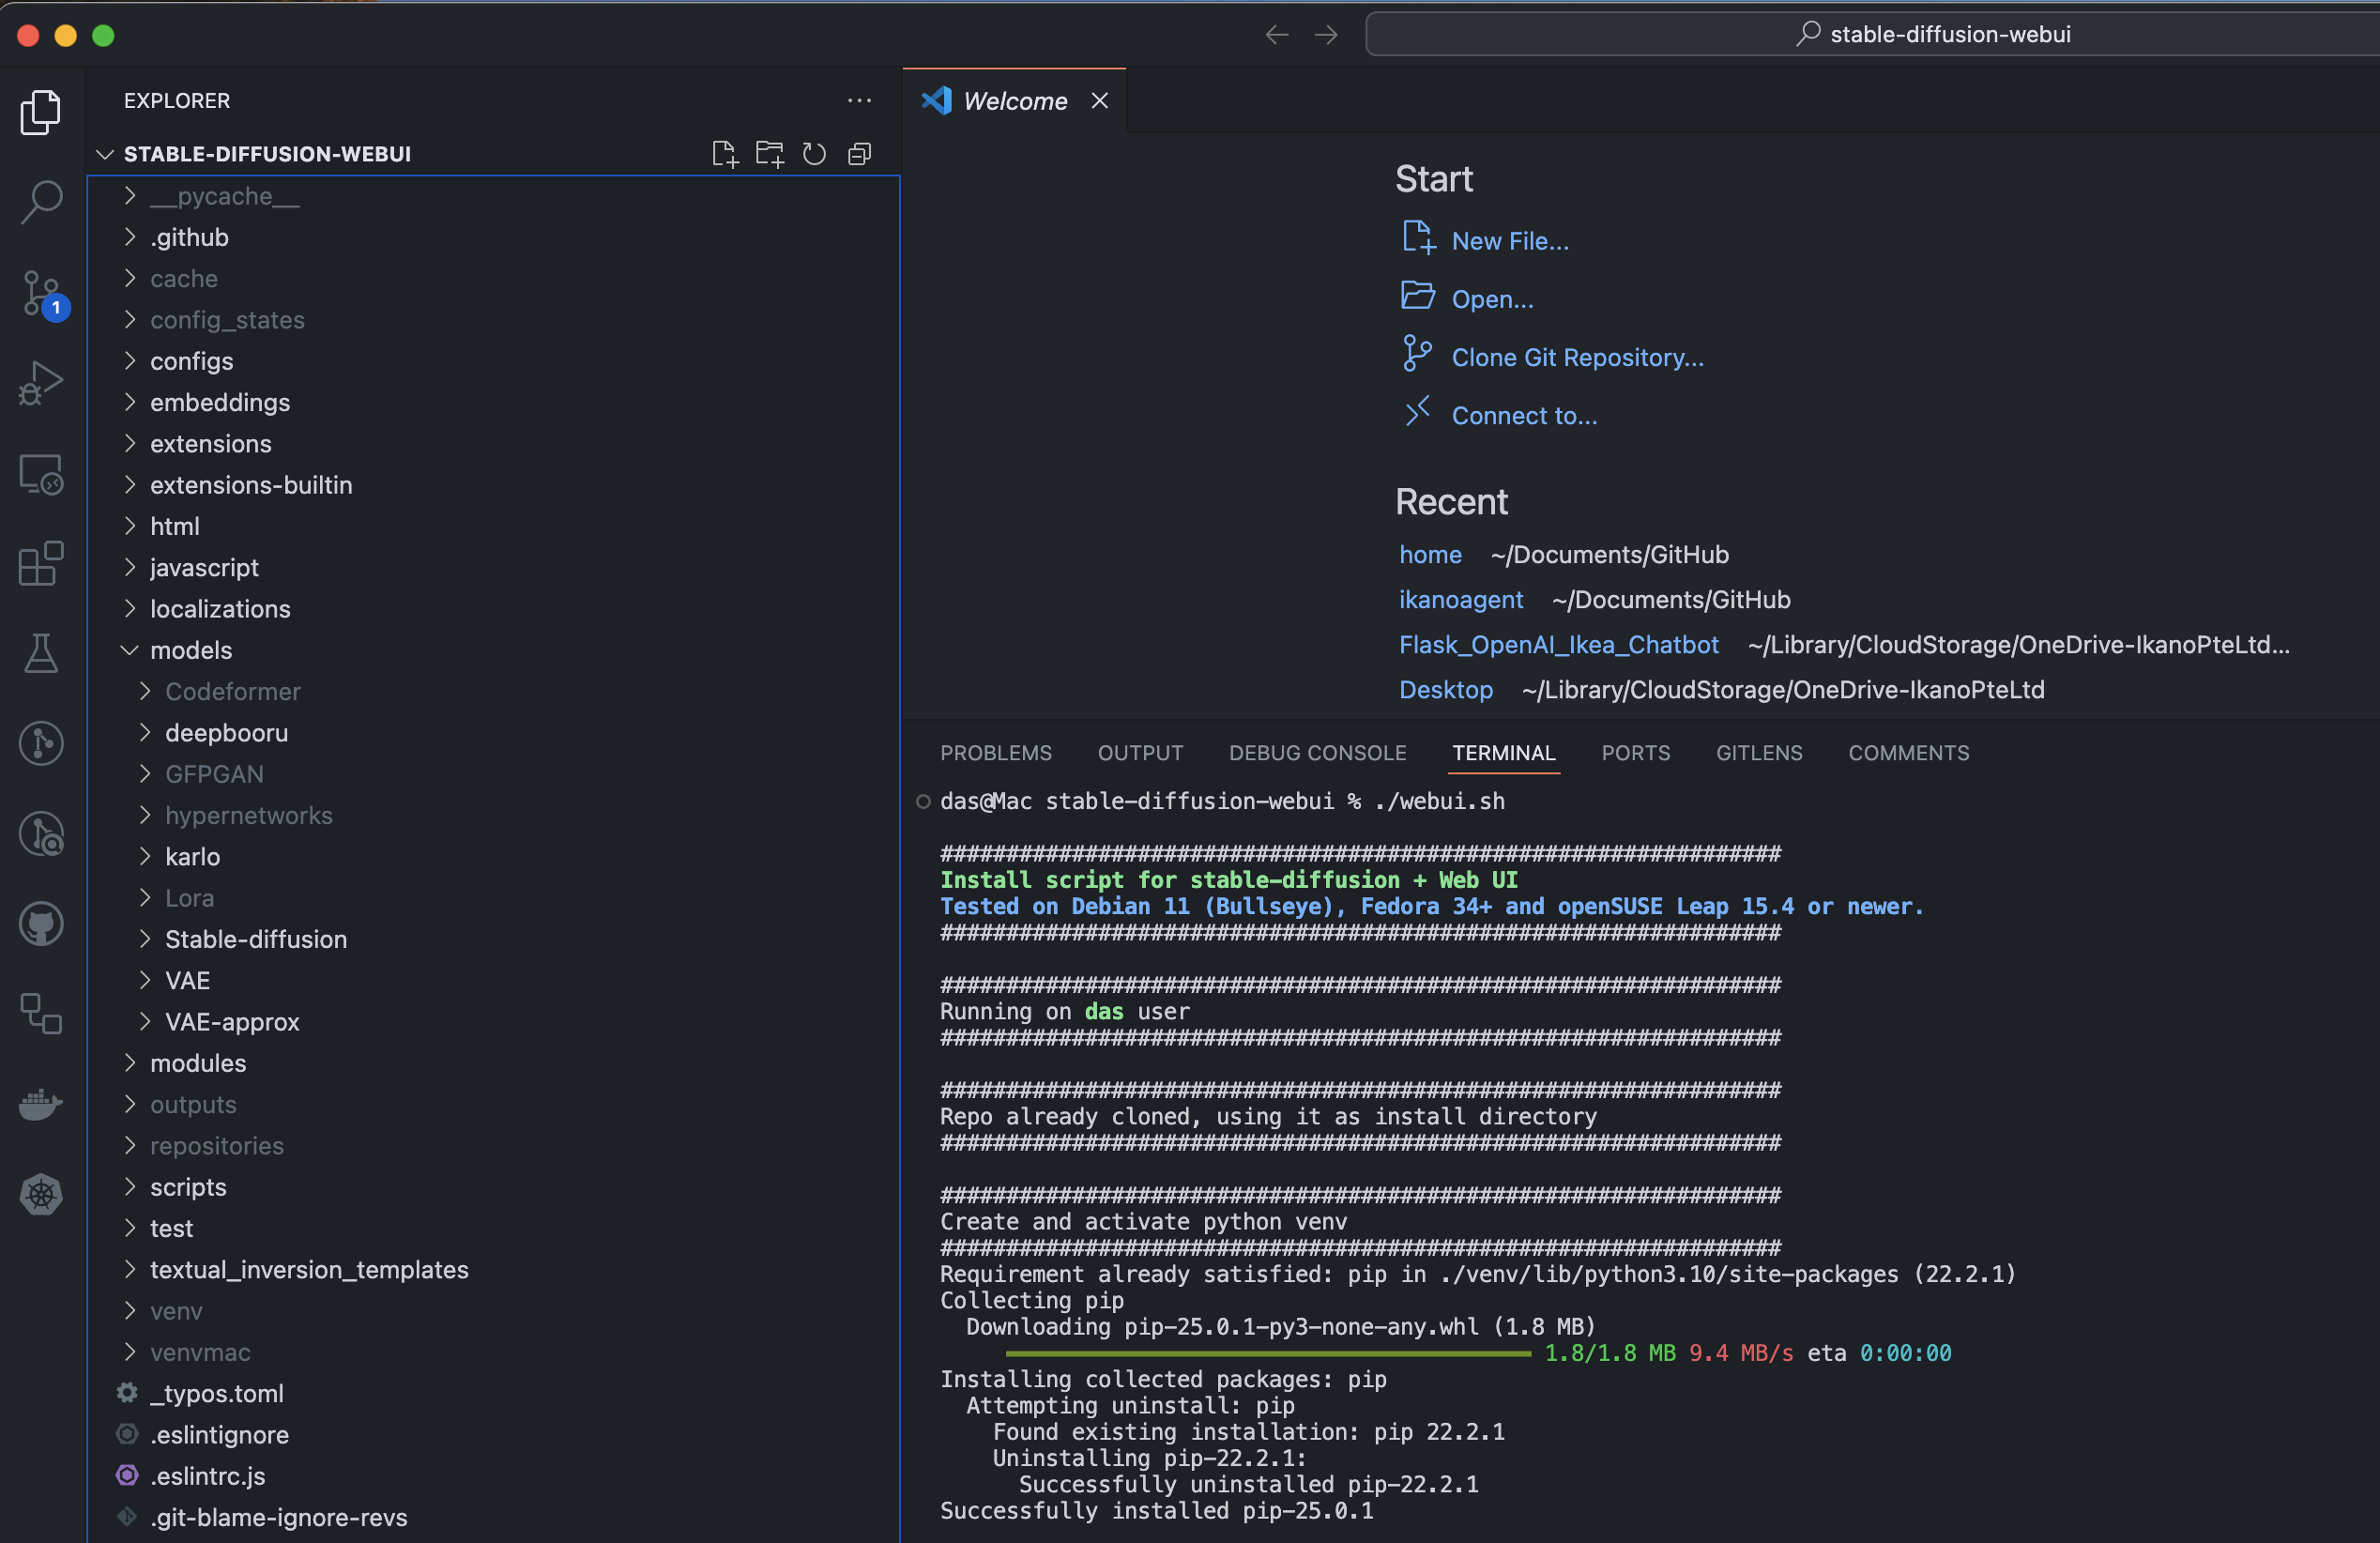
When it runs:
- Dependencies (like PyTorch) are installed if missing.
- The GPU backend is automatically detected. On an Apple Silicon M3 Pro/Max, MPS (Metal Performance Shaders) is used.
Step 7: Access the Web UI
Once the setup completes, the terminal will display a local URL like:
Open that address in your browser to see the AUTOMATIC1111 Stable Diffusion Web UI.
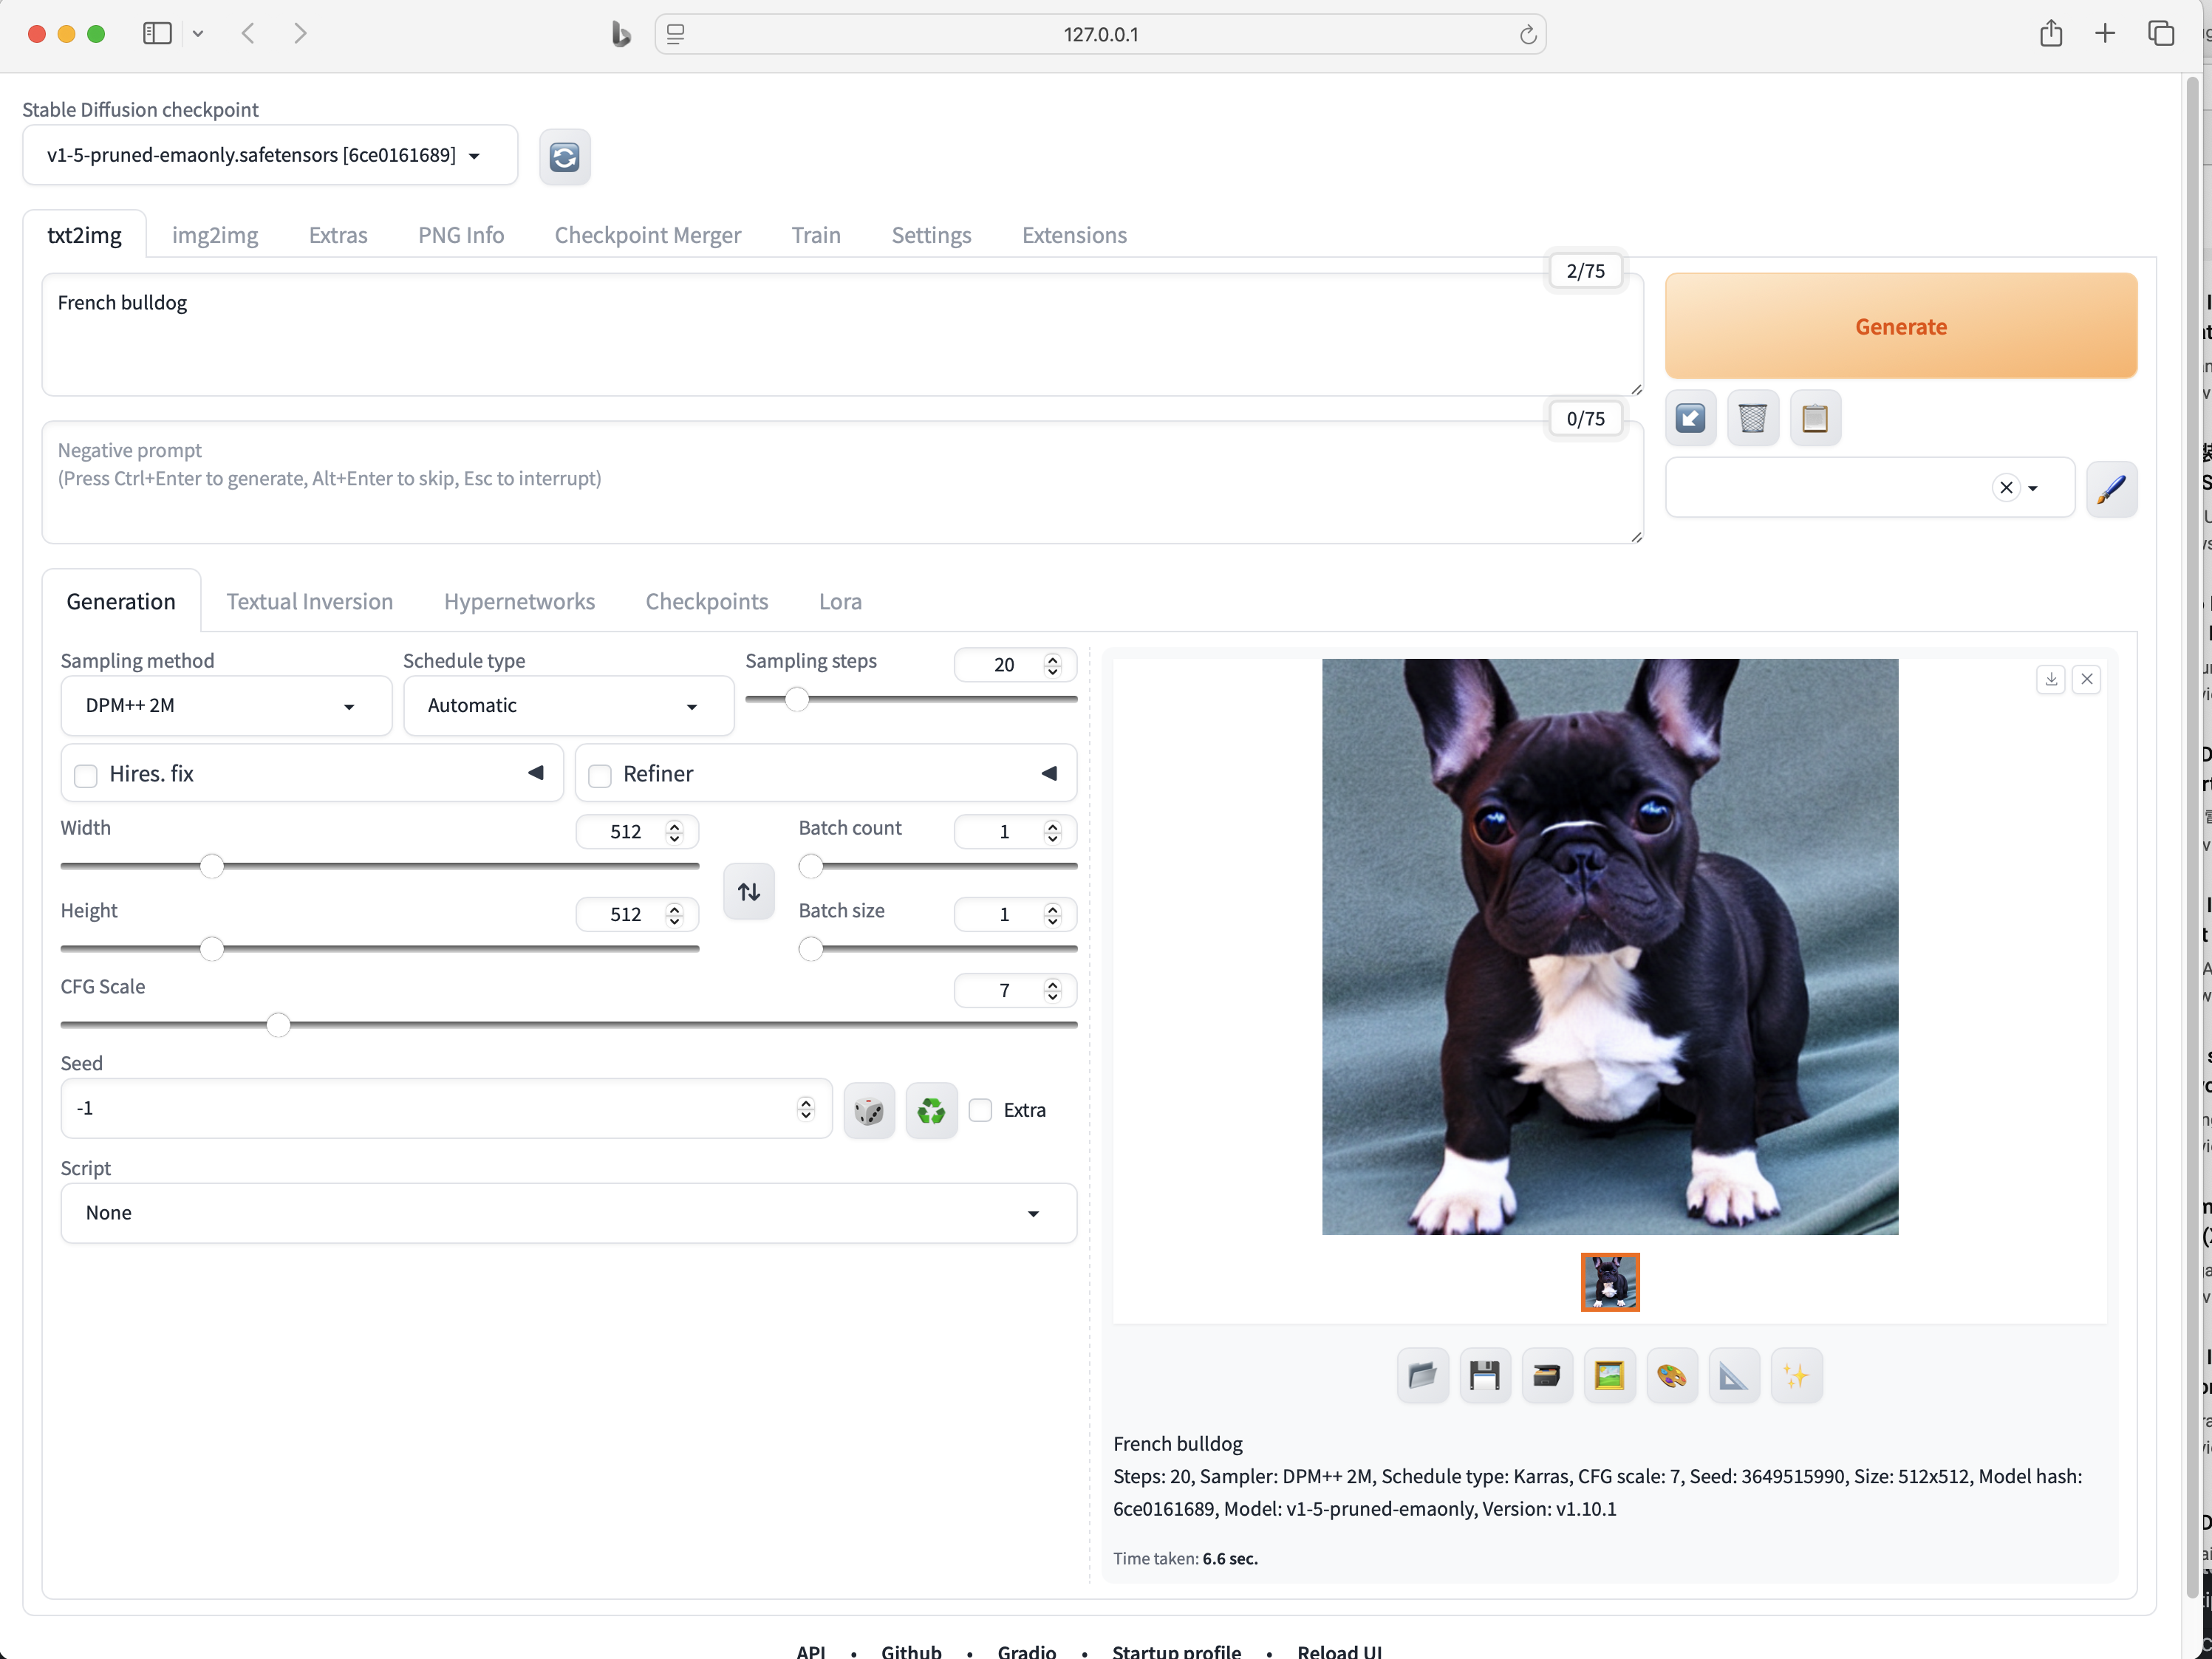
Using the AUTOMATIC1111 Web UI
txt2img
Enter your prompt, pick settings like Sampling Steps or Method (Euler, DPM++, etc.), and click Generate to create an image.
img2img
Upload an existing image and specify how different you want the result to be by adjusting Denoising Strength.
Inpainting
Mask sections of an image and let Stable Diffusion replace them based on your prompt.
Settings & Extensions
Explore advanced options under Settings (paths, optimization, UI tweaks, etc.). In Extensions, you can install additional features (e.g., ControlNet, textual inversions, LoRAs).
Wrap-Up
In my experience, the setup was smooth and worked on the very first try. Generating a simple image at default settings took about 40 seconds, while more detailed prompts produced amusingly random results. Even under heavy load, memory usage stayed below 40 GB on my system. Enjoy your local AI art station on your Mac M3 Pro/Max!