Overview
Power Apps portals & Dynamics 365 portals are now called Power Pages. Power Pages websites can be open-to-all or you can have register/sign-in using Google, LinkedIn, Twitter, and Facebook.

Here, I will show you how to use Google sign-in on your Power Pages websites. The protocol behind this is OAuth2.0. Using this Google allow users to access your site using their google accounts without exposing their userid/passwords.
Steps to follow
Set up Google in Power Pages
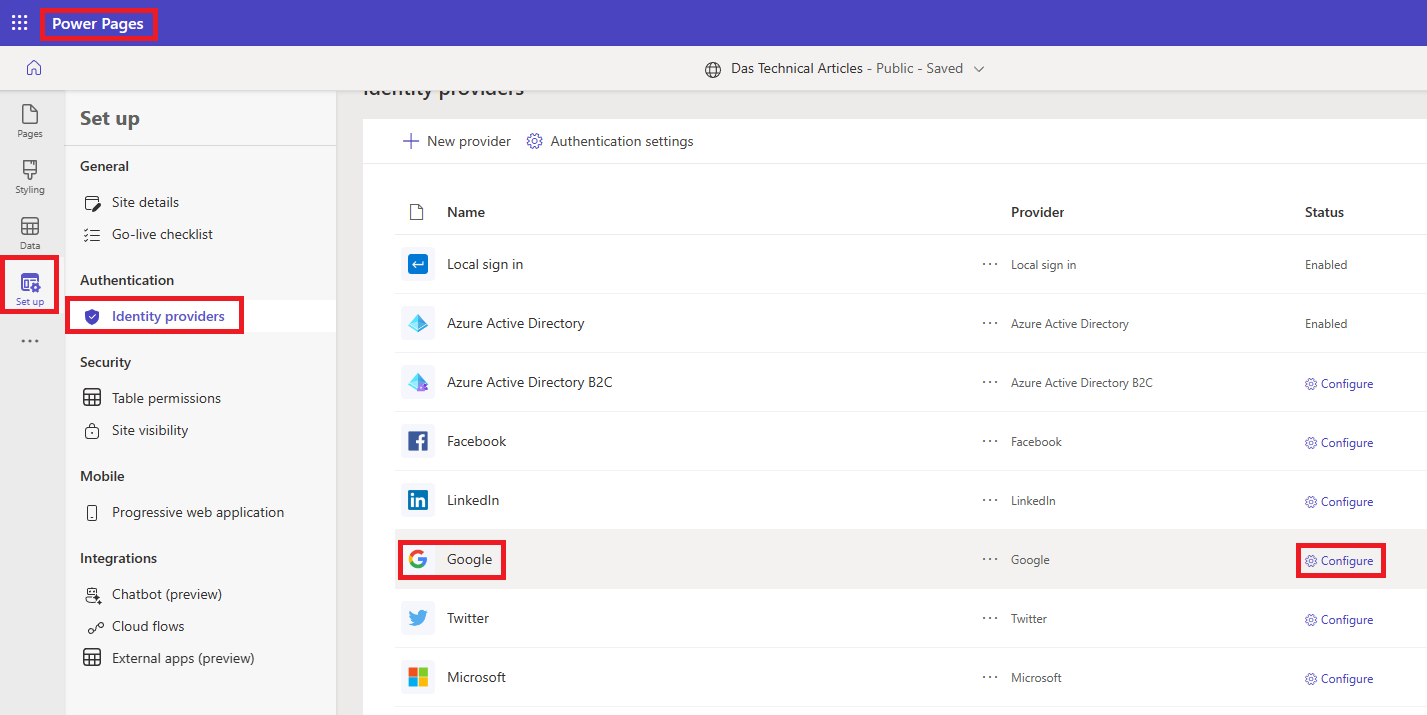
- In your Power Pages site, select Set up > Identity providers.
-
Google > More Commands (…) > Configure.

-
Select Next.
- Under Reply URL, select Copy.
- Select Open Google.
Register an App in Google
Add the API
-
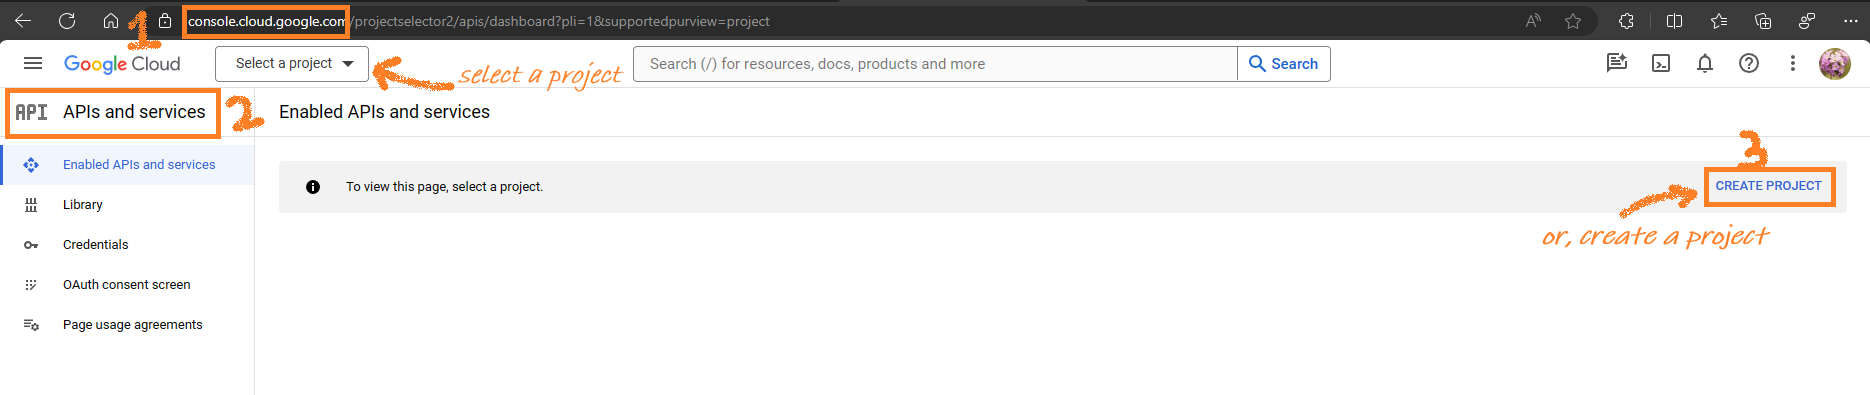
Open the Google Developers Console. And create an API project.
-
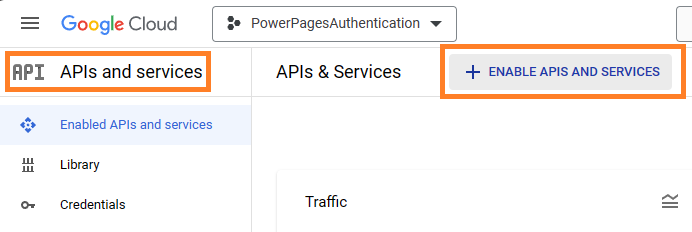
In the left side panel, select APIs & Services.
-
Select + Enable APIs and Services.
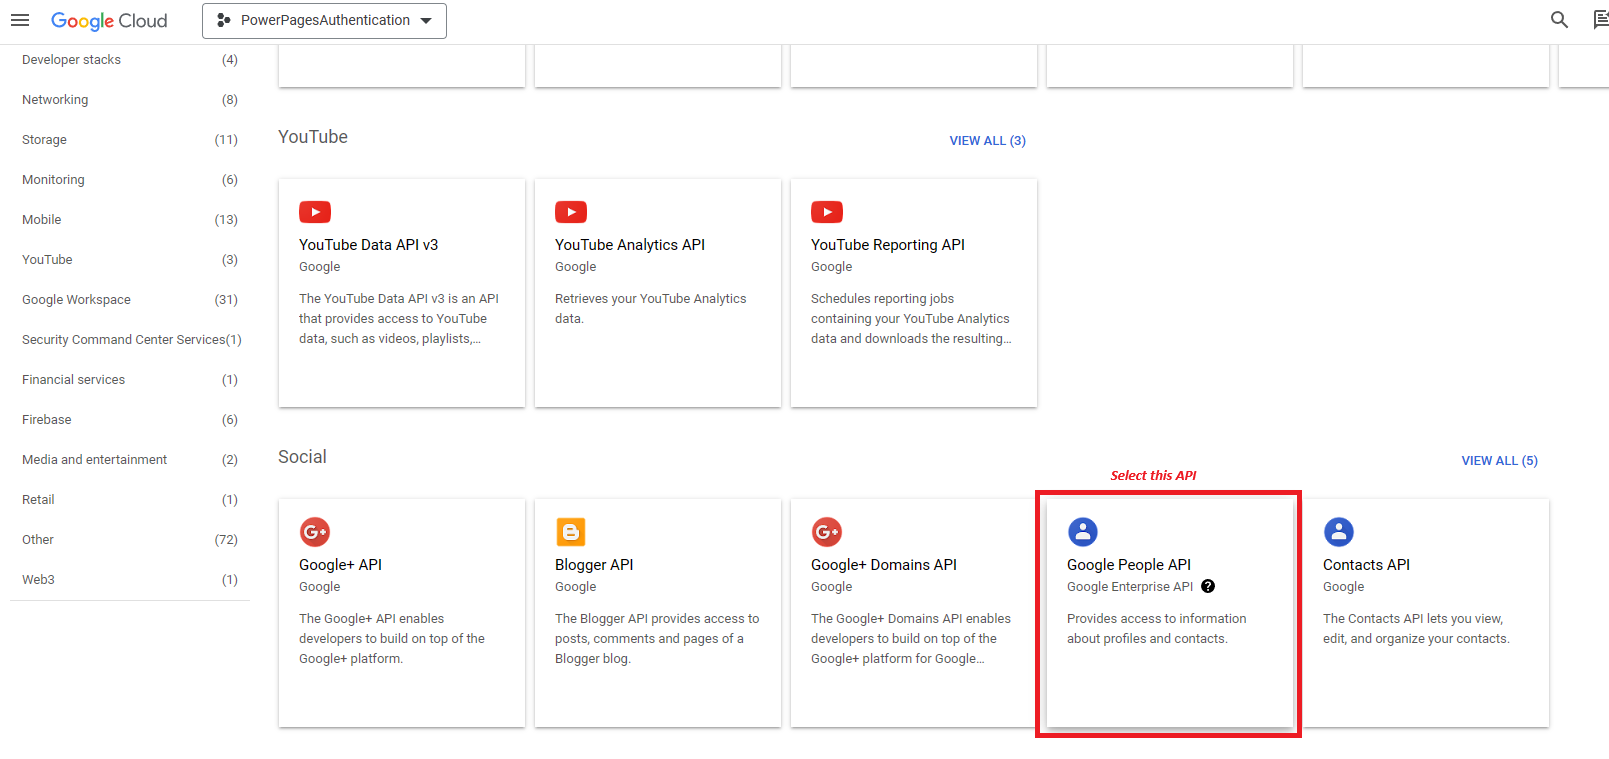
-
Search for and enable Google People API.
Set up your consent screen
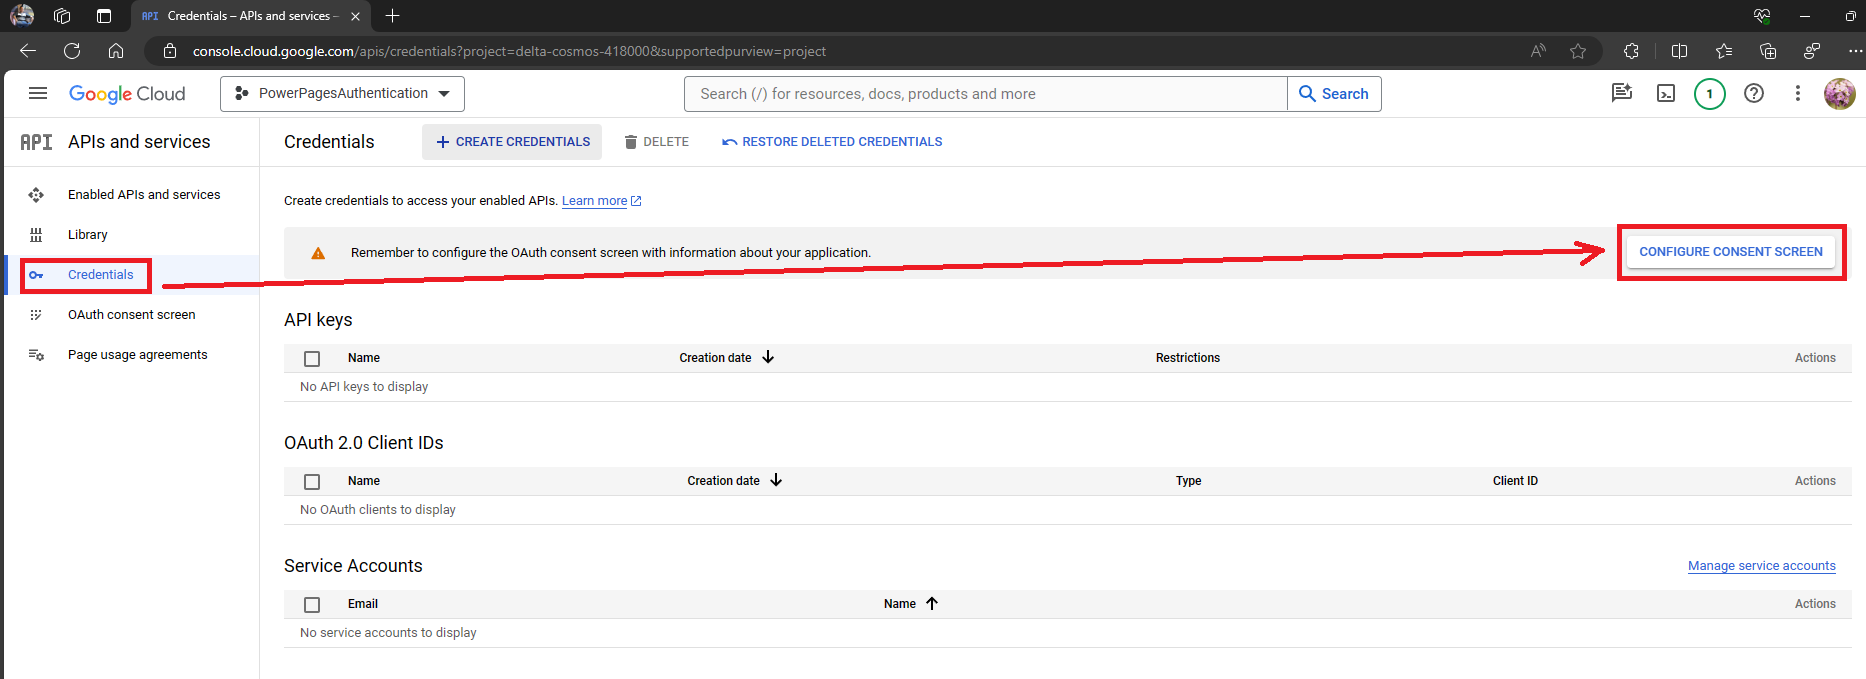
-
In the left side panel, select Credentials > Configure consent screen.
-
Select the External user type and click Create.
- Enter the name of the application and select your organization's user support email address.
- Upload a logo image file if necessary.
- Enter the URLs of your site's home page, privacy policy, and terms of service, if applicable.
- Enter an email address where Google can send you developer notifications.
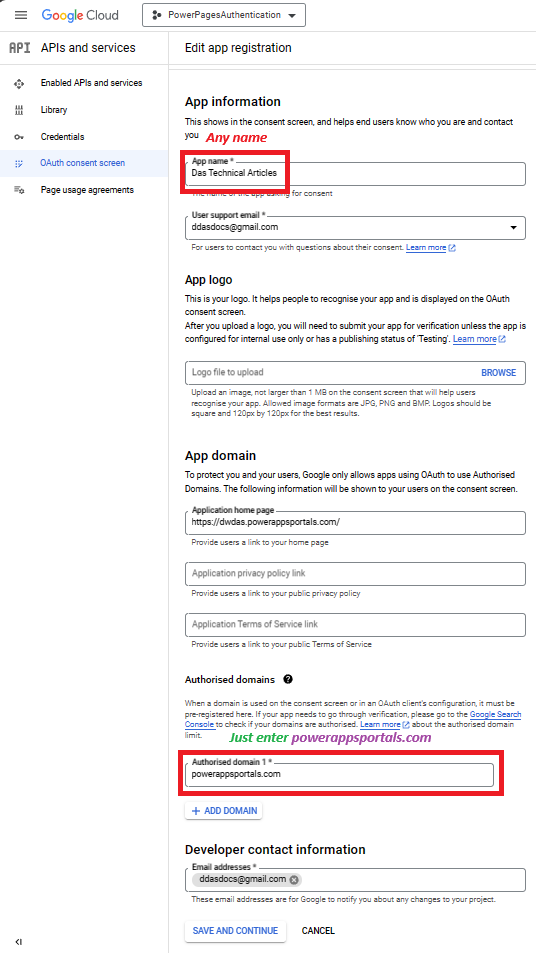
Enter your top-level domain
- Under Authorized domains, select + Add Domain.
- Enter your site's top-level domain; for example,
powerappsportals.com. - Select Save and Continue.
Add credentials
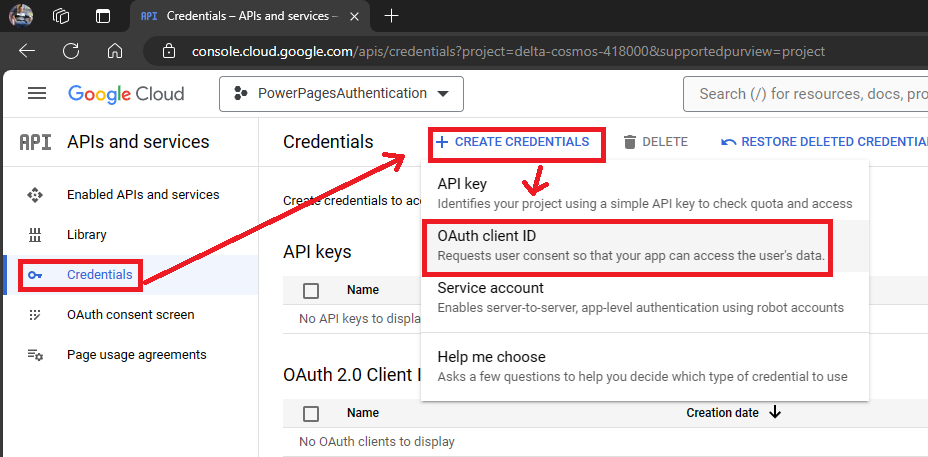
- In the left side panel, select Credentials.
-
Select Create credentials > OAuth client ID.
-
Select Web application as the application type.
- Enter any name e.g.
Web sign-in. This is internal. Not shown. - Under Authorized JavaScript origins, select + Add URI.
- Enter your site's URL; for example,
https://mySite.powerappsportals.com. - Under Authorized redirect URIs, select + Add URI.
-
Enter your site's URL followed by
/signin; for example,https://mySite.powerappsportals.com/signin.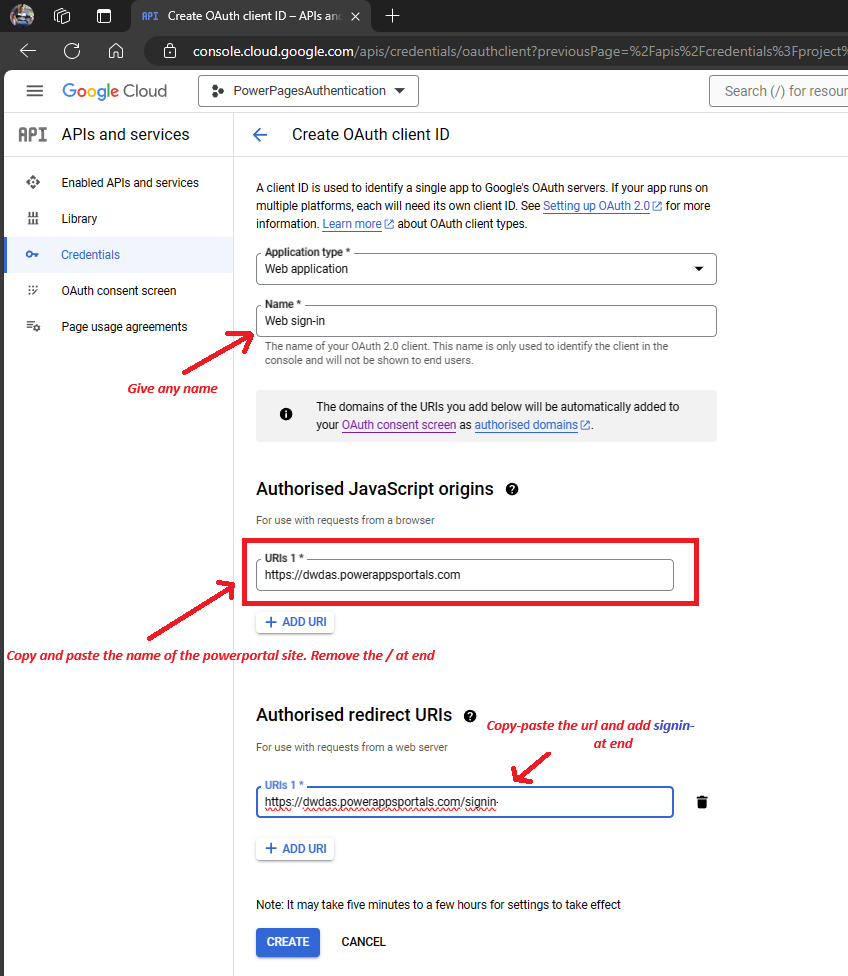
-
Select Create.
-
In the OAuth client created window, select the copy icons to copy the Client ID and Client secret.
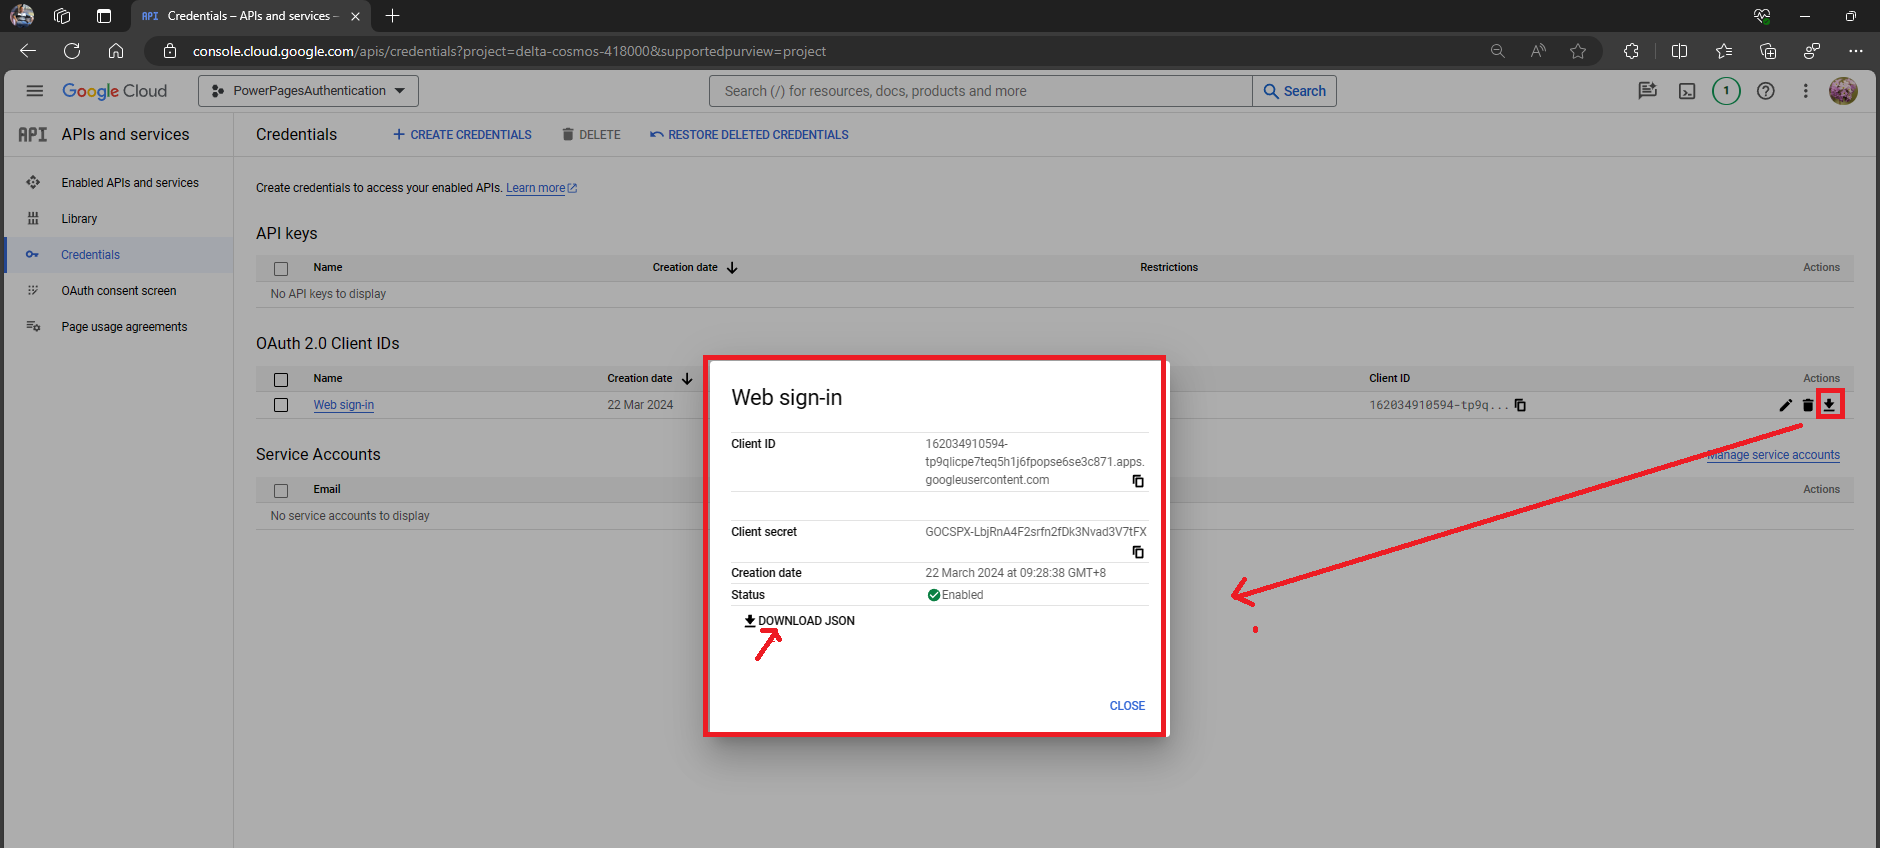
-
Click CLOSE.
Enter site settings in Power Pages
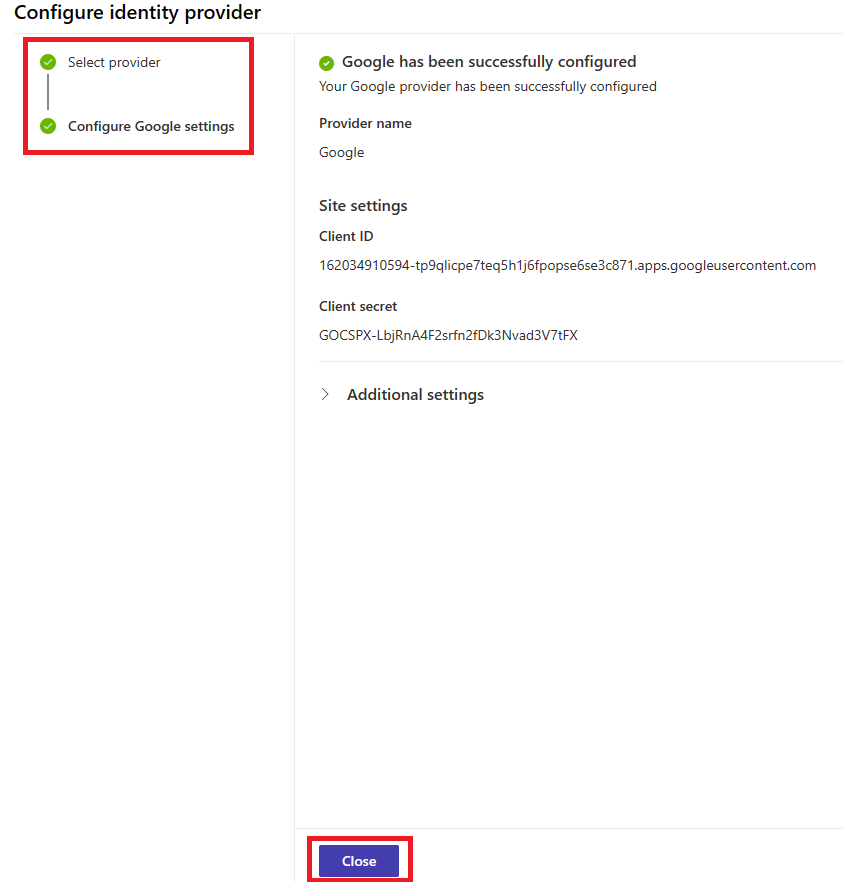
- Return to the Power Pages Configure identity provider page you left earlier.
- Under Configure site settings, paste the following values:
- Client ID: Paste the Client ID you copied.
- Client secret: Paste the Client secret you copied.
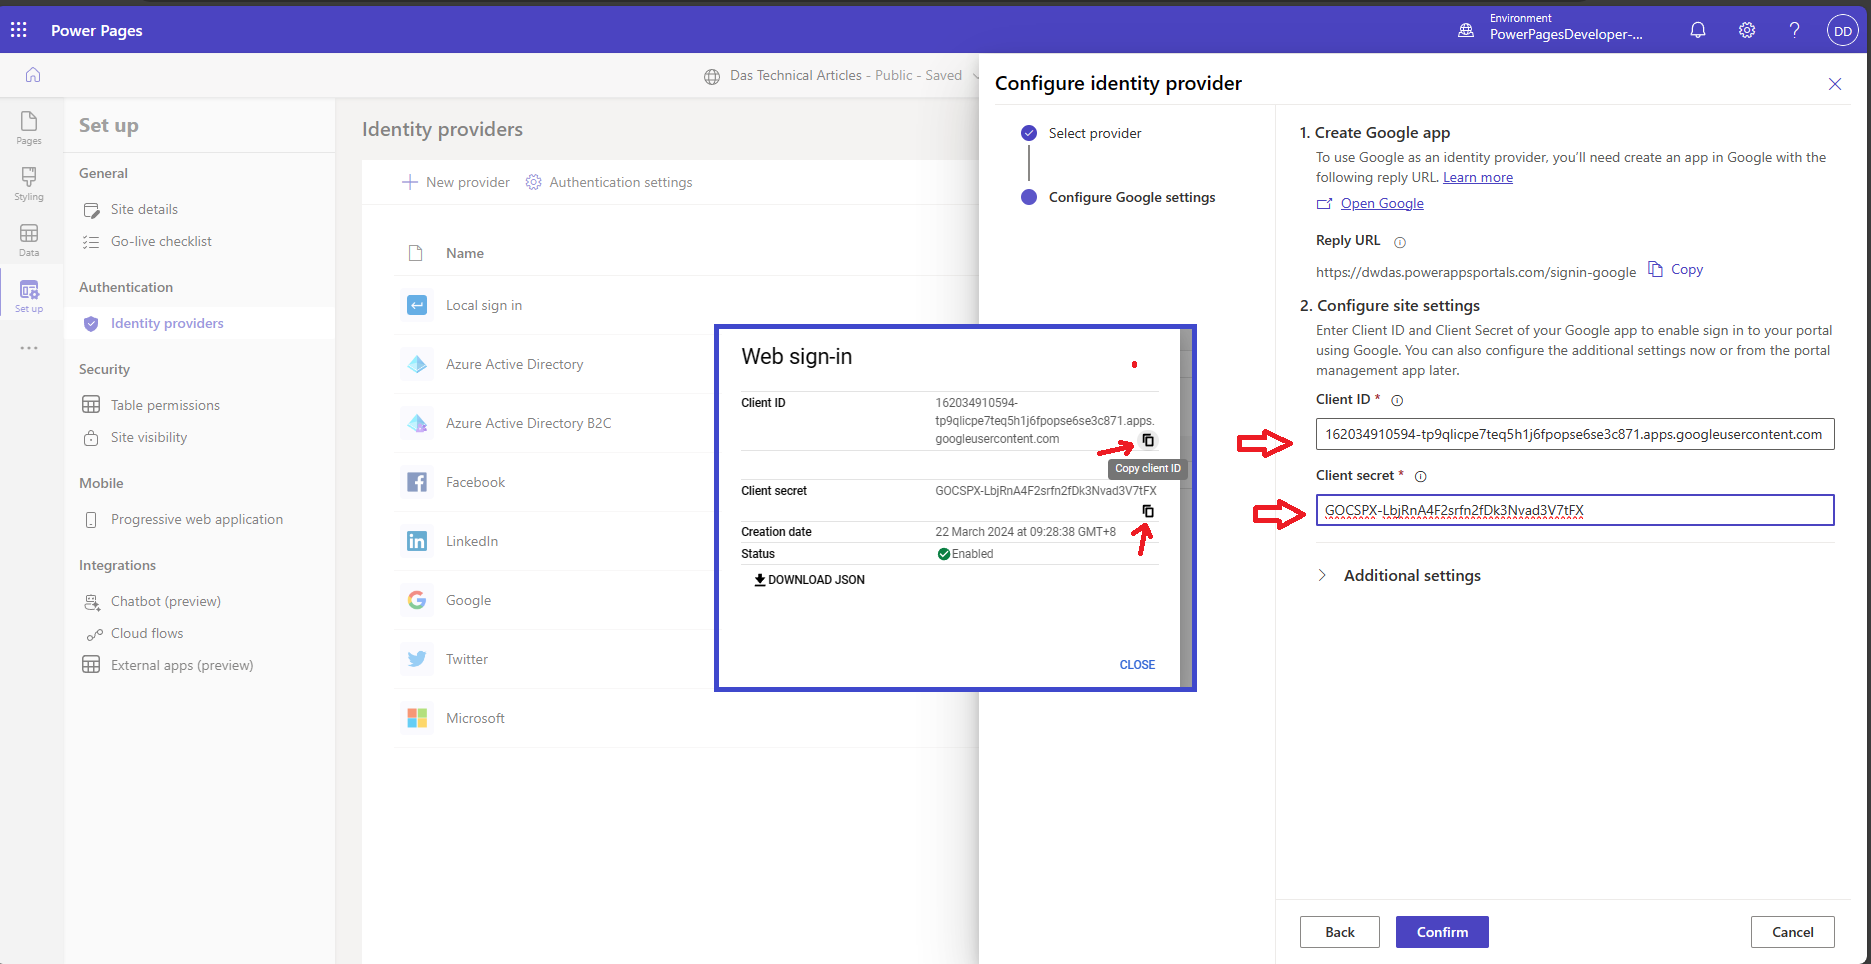
- Click Continue then Close
Appendix
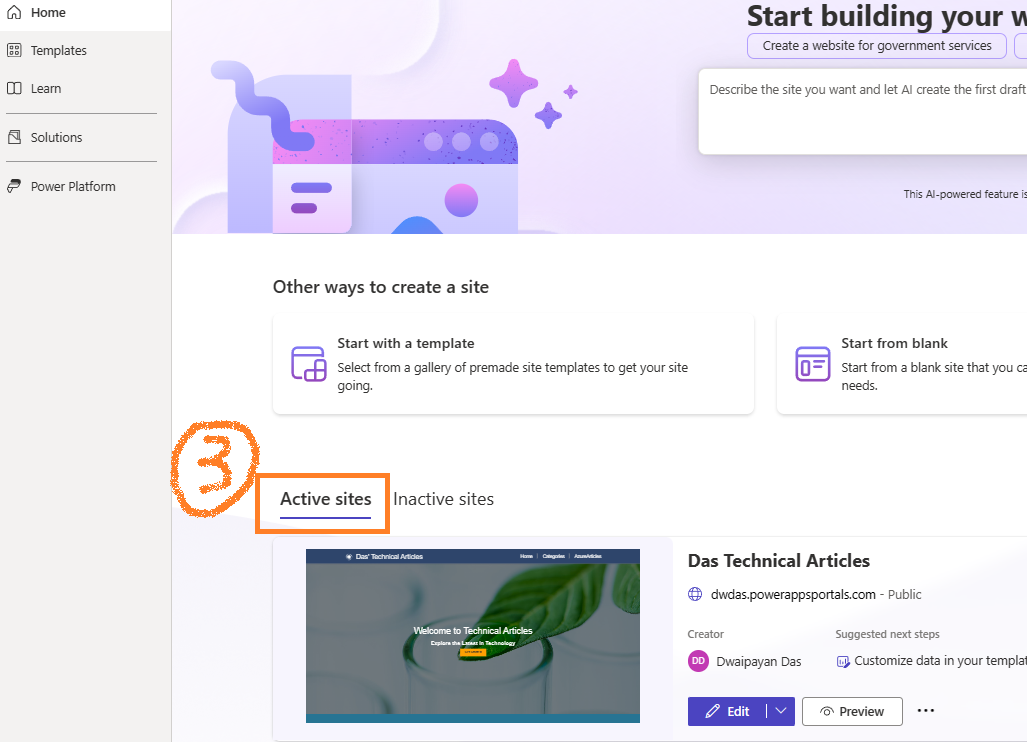
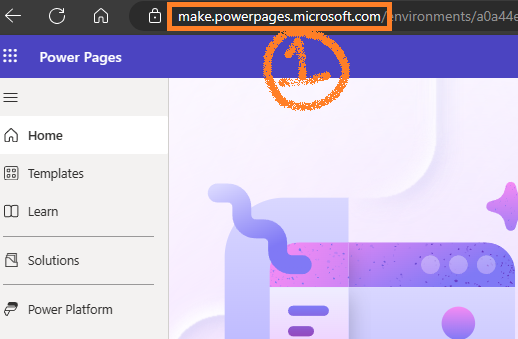
How to open Power Page Design Studio
- Go to Power Pages(https://make.powerpages.microsoft.com/)
- Select the Microsoft Dataverse environment
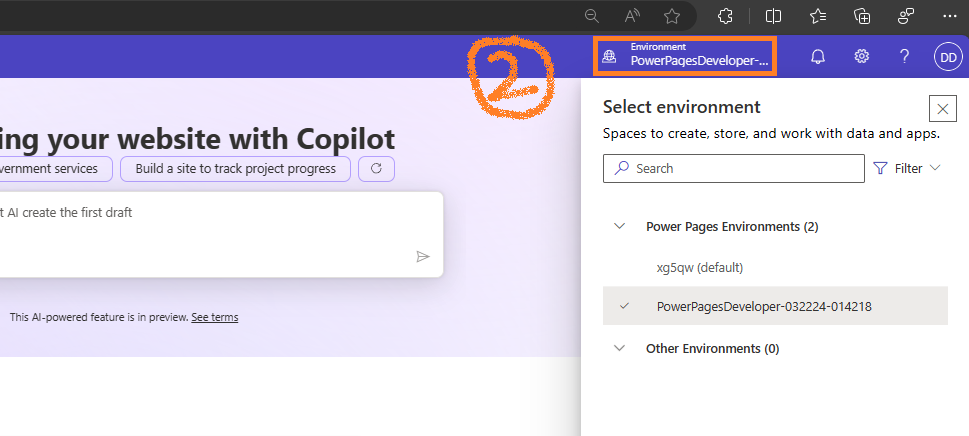
- Locate your site in the Active sites list.